有偿问答
面经分享
技术探讨
资料领取
登录
开发SpringBoot+Jwt+Vue的前后端分离后台管理系统VueAdmin - 前端笔记
社长
1年前
⋅ 82163 阅读
一个spring security + jwt + vue的前后端分离项目!综合运用! 关注公众号 MarkerHub,回复【 **VueAdmin** 】可以加群讨论学习、另外还会不定时安排B站视频直播答疑! ------ > 首发公众号:MarkerHub > > 作者:吕一明 > > 视频讲解:https://www.bilibili.com/video/BV1af4y1s7Wh/ > > 线上演示:https://www.markerhub.com/vueadmin/ > > 转载请保留此应用,万分感谢! ## 1. 前言 在之前,我写了一个前后端分离的简易[博客系统vueblog](https://www.bilibili.com/video/BV1PQ4y1P7hZ/?fileGuid=HXqVy6jx8qkWKPJq),在B站也已经收获了13万的播放量了,也还算受欢迎吧,感谢大家的认同与支持!同时有些刚入门的同学还是说有些地方不清楚,跟着做的时候还是会出现错误,或者不理解为啥这样处理,这次我更详细点。 而接下来,我们即将开发一个前后端分离的后台管理系统[VueAdmin](https://www.markerhub.com/vueadmin/)。这个管理系统与我们之前的博客系统技术选型上其实有很多相似之处,只不过权限框架我选用了spring security,然后相对来说权限模块开发就多点代码,也仅此而已了。对了前端的系统界面也是我们一步步开发的,所以希望能帮助大家熟悉一个后台管理系统,也希望大家学到东西哈。 我的公众号MarkerHub,希望大家能关注支持我哈! ## 2. 安装vue环境,并新建Vue项目 前端我们依然选择的是Vue+ElementUI的组合,主要还是因为这个主流呀。针对Vue,如果还不熟悉的同学,建议去看看这个视频【[4个小时带你快速入门vue](https://www.bilibili.com/video/BV125411W73W/?fileGuid=HXqVy6jx8qkWKPJq)】,我也是学这个视频入门的,就学了半天,哈哈。主要Js基础扎实点学起来挺快的。 首先我们安装vue的环境,我实践的环境是windows 10哈。 1、首先我们上node.js官网([https://nodejs.org/zh-cn/](https://nodejs.org/zh-cn/?fileGuid=HXqVy6jx8qkWKPJq)),下载最新的长期版本,直接运行安装完成之后,我们就已经具备了node和npm的环境啦。 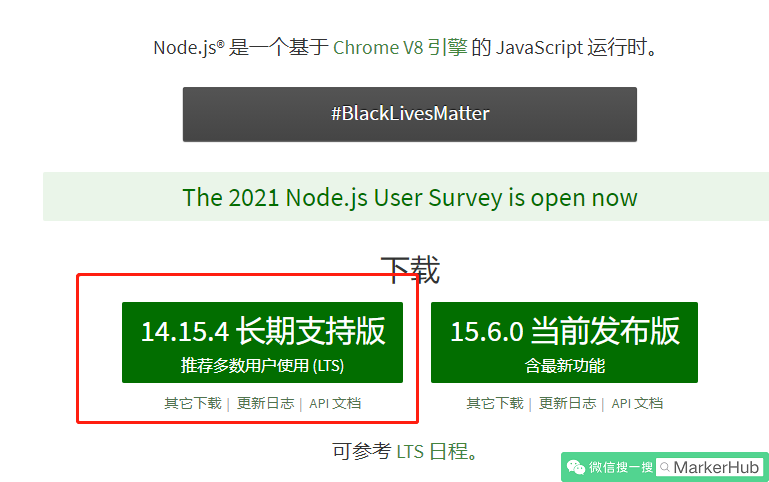 安装完成之后检查下版本信息: 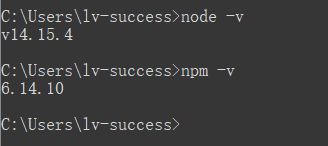 这就表示你已经安装成功啦,牛逼开始的第一步! 2、接下来,我们安装vue的环境 ```plain # 安装淘宝npm npm install -g cnpm --registry=https://registry.npm.taobao.org # vue-cli 安装依赖包 cnpm install --g vue-cli # 打开vue的可视化管理工具界面 vue ui ``` 上面我们分别安装了淘宝npm,cnpm是为了提高我们安装依赖的速度。vue ui是@vue/cli3.0增加一个可视化项目管理工具,可以运行项目、打包项目,检查等操作。对于初学者来说,可以少记一些命令,哈哈。 3、创建vueadmin-vue项目 运行vue ui之后, 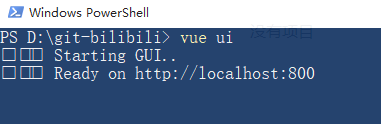 会为我们打开一个http://localhost:8080 的页面: 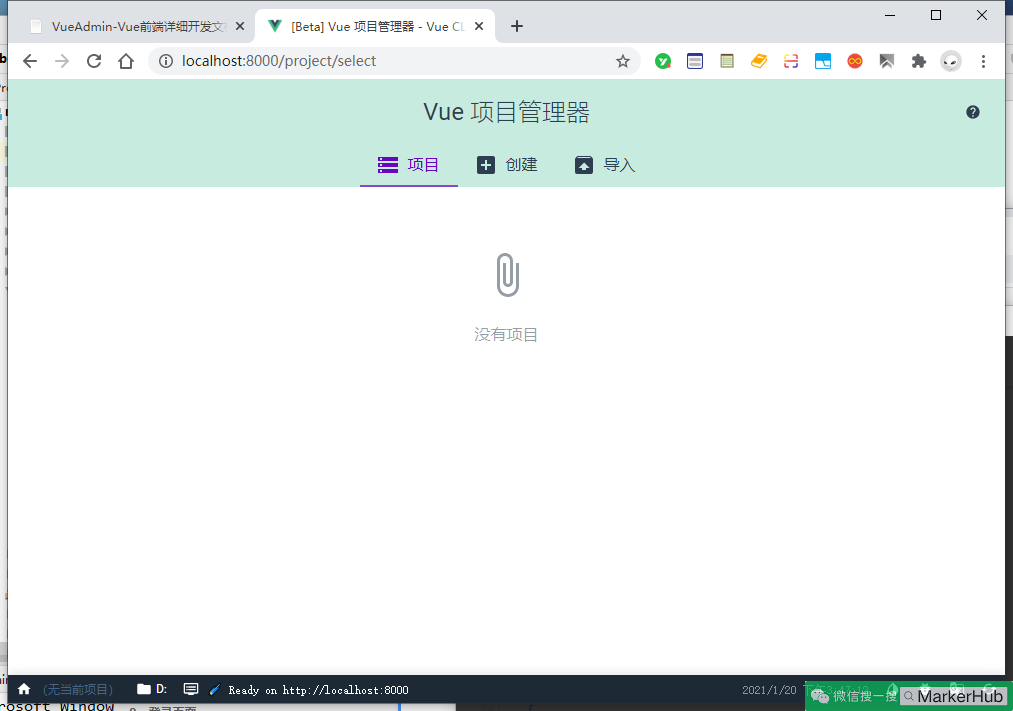 我们将在这个页面完成我们的前端Vue项目的新建。然后切换到【创建】,注意创建的目录最好是和你运行vue ui同一级。这样方便管理和切换。 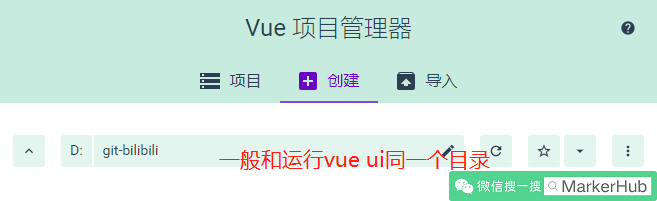 然后点击按钮【在此创建新项目】下一步中,项目文件夹中输入项目名称“vueblog-vue”,其他不用改。 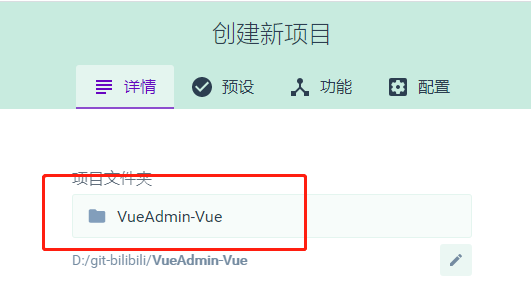 点击下一步,选择【手动】,再点击下一步,如图点击按钮,勾选上路由Router、状态管理Vuex,去掉js的校验。 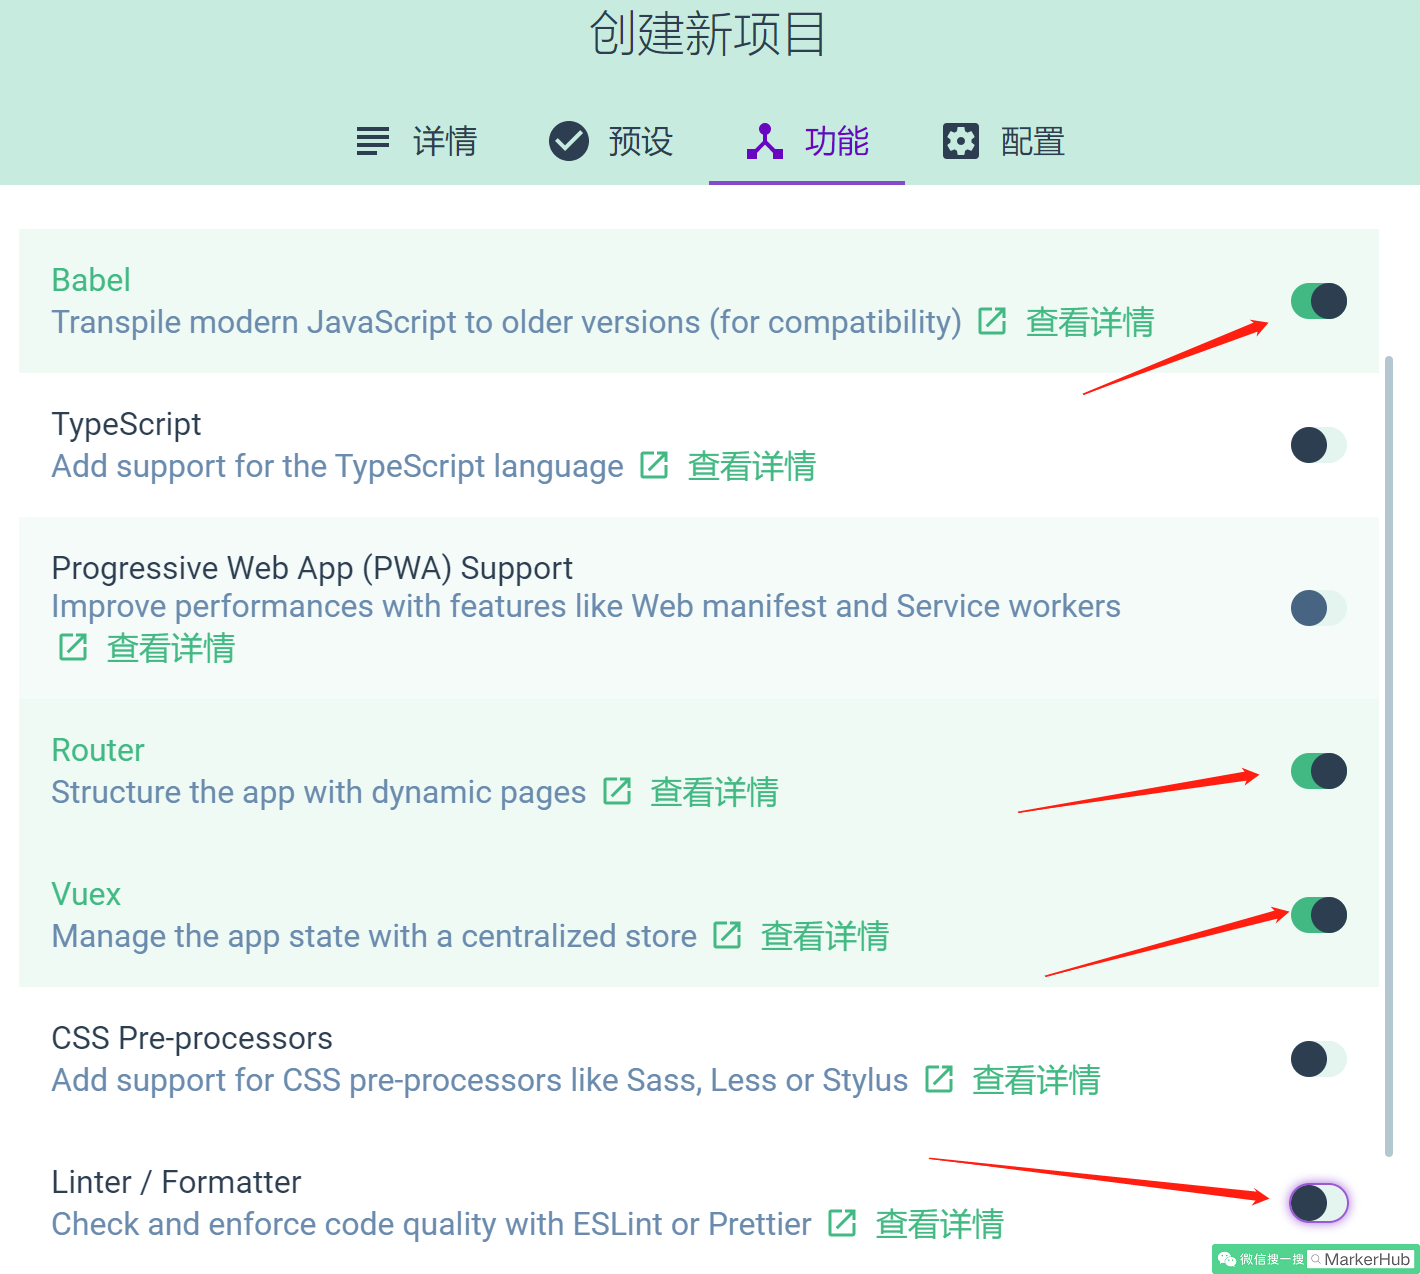 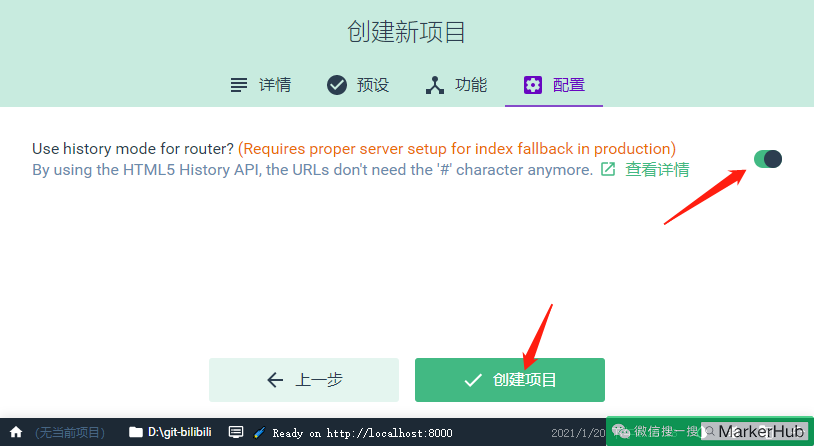 下一步中,也选上【Use history mode for router】,点击创建项目,然后弹窗中选择按钮【创建项目,不保存预设】,就进入项目创建啦。 稍等片刻之后,项目就初始化完成了。上面的步骤中,我们创建了一个vue项目,并且安装了Router、Vuex。这样我们后面就可以直接使用。 * **Router:** WebApp的链接路径管理系统,简单就是建立起url和页面之间的映射关系 * **Vuex:** 一个专为 Vue.js 应用程序开发的`状态管理模式`,简单来说就是为了方便数据的操作而建立的一个临时” 前端数据库“,用于各个组件间共享和检测数据变化。 ok,我们使用IDEA导入项目,看看创建好的项目长啥样子: 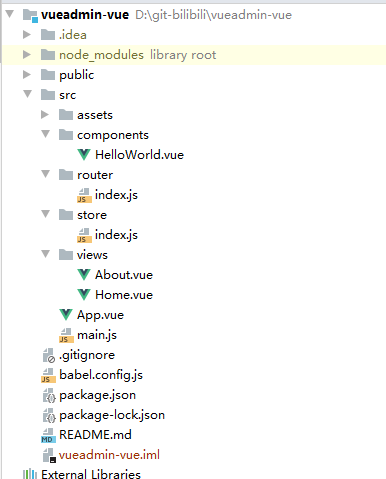 当然了,IDEA我们要预先先安装好一个Vue插件,这样我们就可以使用IDEA像WebStorm一样开发Vue项目啦,毕竟都是同一个家族出品的哈哈。 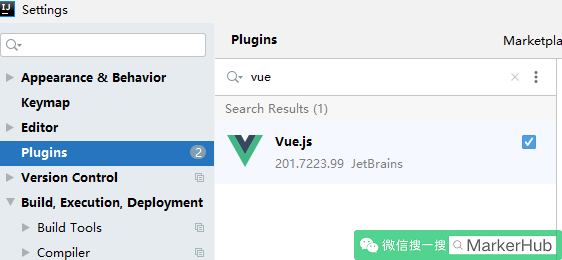 然后我们在IDEA窗口的底部打开Terminal命令行窗口,输入npm run serve运行vue项目,我们就可以通过[http://localhost:8080/](http://localhost:8080/?fileGuid=HXqVy6jx8qkWKPJq)打开我们的项目了。 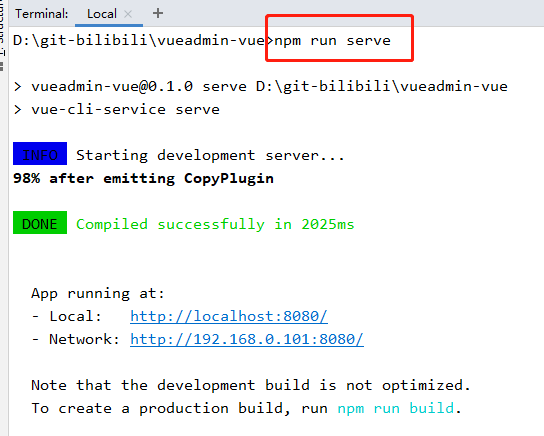 效果如下,Hello Vue! 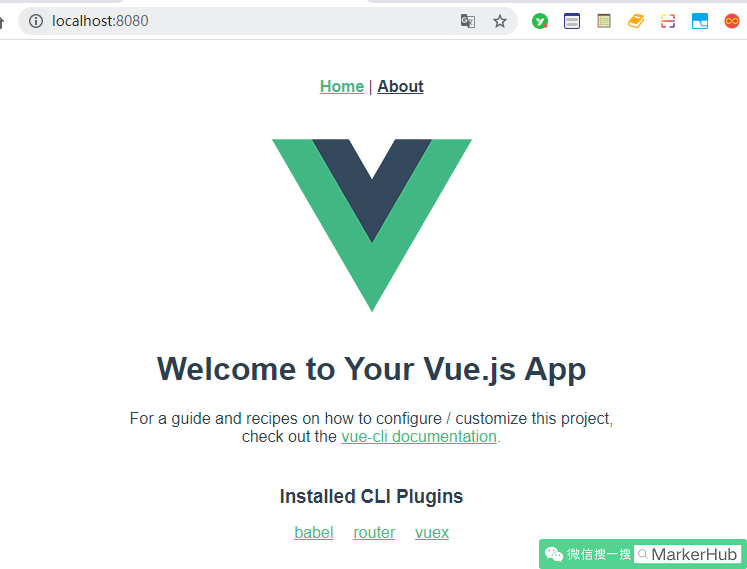 线上演示:https://www.markerhub.com/vueadmin/ ## 3. 安装element-ui 接下来我们引入element-ui组件([https://element.eleme.cn](https://element.eleme.cn/#/zh-CN/component/installation?fileGuid=HXqVy6jx8qkWKPJq)),这样我们就可以获得好看的vue组件,开发好看的后台管理系统的界面啦。 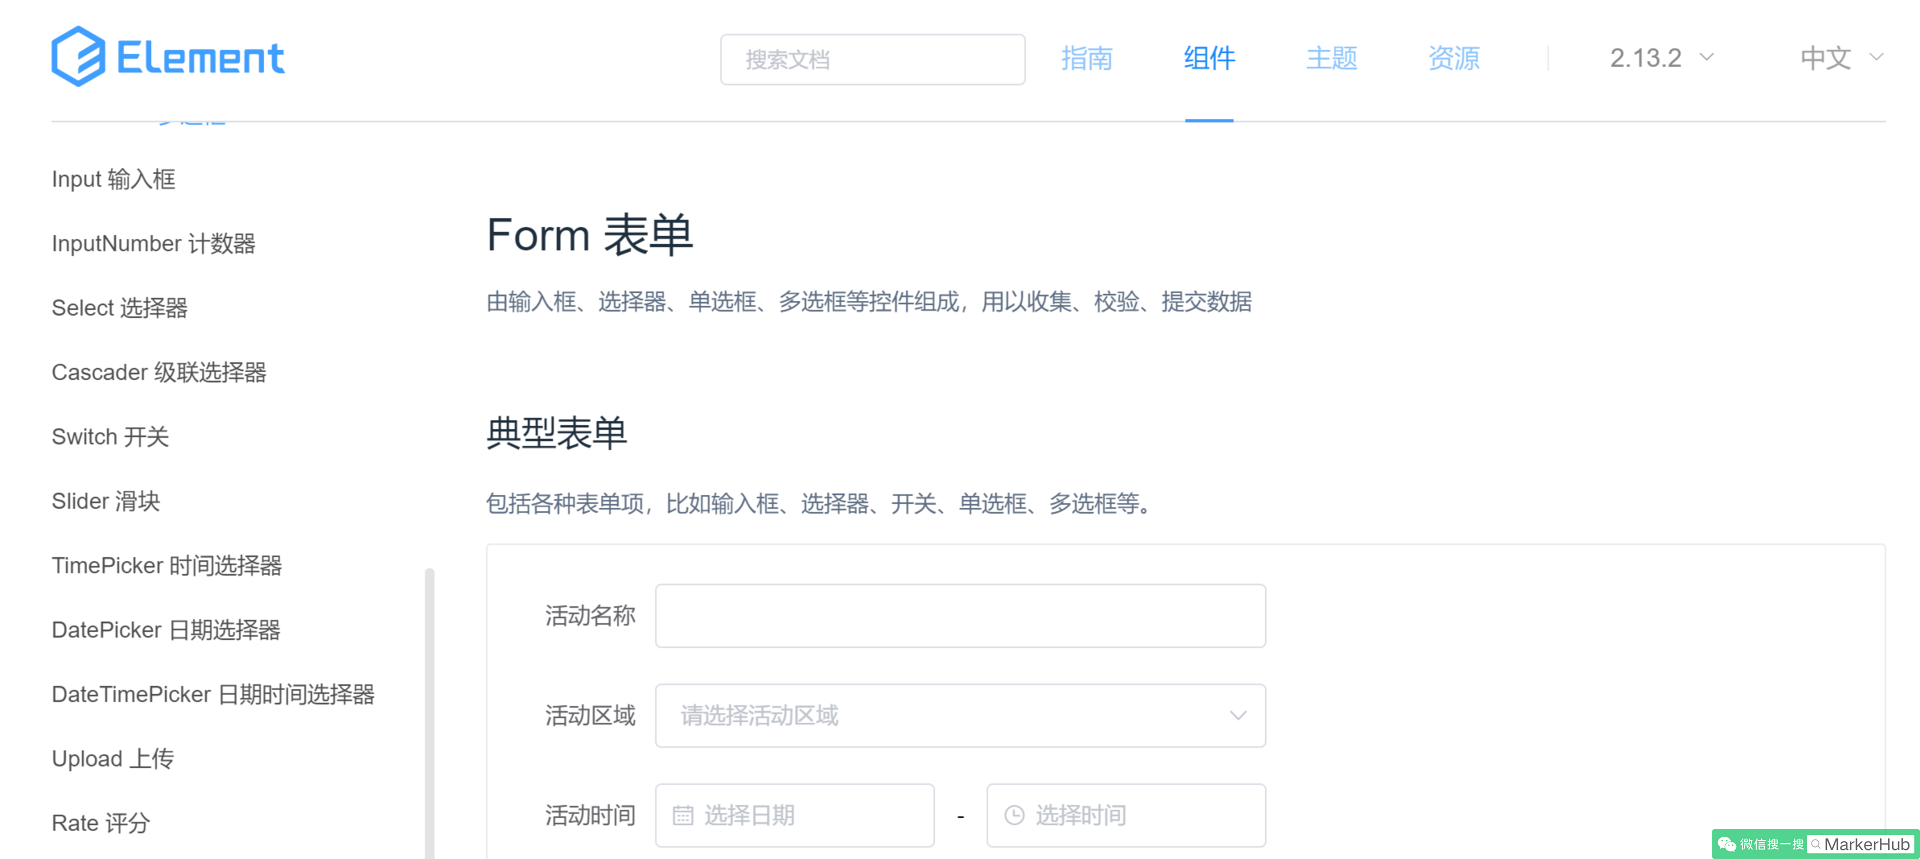 命令很简单: ```plain # 切换到项目根目录 cd vueadmin-vue # 或者直接在idea中执行下面命令 # 安装element-ui cnpm install element-ui --save ``` 然后我们打开项目src目录下的main.js,引入element-ui依赖。 ```plain import Element from 'element-ui' import "element-ui/lib/theme-chalk/index.css" Vue.use(Element) ``` 这样我们就可以愉快得在官网上选择组件复制代码到我们项目中直接使用啦。 ## 4. 安装axios、qs、mockjs * **axios**:一个基于 promise 的 HTTP 库,类ajax * **qs**:查询参数序列化和解析库 * **mockjs**:为我们生成随机数据的工具库 接下来,我们来安装axios([http://www.axios-js.com/](http://www.axios-js.com/?fileGuid=HXqVy6jx8qkWKPJq)),axios是一个基于 promise 的 HTTP 库,这样我们进行前后端对接的时候,使用这个工具可以提高我们的开发效率。 安装命令: ```plain cnpm install axios --save ``` 然后同样我们在main.js中全局引入axios。 ```plain import axios from 'axios' Vue.prototype.$axios = axios // ``` 组件中,我们就可以通过this.$axios.get()来发起我们的请求了哈。当然了,后面我们添加axios拦截的时候我们需要修改引入的编写。 同时,我们同步安装一个qs,什么是qs?qs是一个流行的查询参数序列化和解析库。可以将一个普通的object序列化成一个查询字符串,或者反过来将一个查询字符串解析成一个object,帮助我们查询字符串解析和序列化字符串。 ```plain cnpm install qs --save ``` 然后因为后台我们现在还没有搭建,无法与前端完成数据交互,因此我们这里需要mock数据,因此我们引入mockjs([http://mockjs.com/](http://mockjs.com/?fileGuid=HXqVy6jx8qkWKPJq)),方便后续我们提供api返回数据。 ```plain cnpm install mockjs --save-dev ``` 然后我们在src目录下新建mock.js文件,用于编写随机数据的api,然后我们需要在main.js中引入这个文件: * src/main.js ```plain require("./mock") //引入mock数据,关闭则注释该行 ``` 后面我们mackjs会自动为我们拦截ajax,并自动匹配路径返回数据! ## 5. 页面路由 接下来,在开发页面之前我们需要先定义路由。传统项目开发,我们都是通过链接到达控制器然后再到页面渲染的。而类似于Vue这样的前后端分离性质的框架,我们是先访问页面,然后再异步加载数据渲染。而在Vue中,路由的管理是有个专门的组件叫Router管理的。 我们在新建项目的时候也提了一下,大家还记得吧。我们当时说: * **Router**:WebApp的链接路径管理系统,简单就是建立起url和页面之间的映射关系 所以我们要打开页面然后开发页面,我们需要先配置路由,然后再开发,这样我们可以试试看到效果。项目中,src\router\index.js就是用来配置路由的。 我们在views文件夹下定义几个页面: * Login.vue(登录页面) * Index.vue(首页) 我们新建Vue页面的时候可以这样新建: 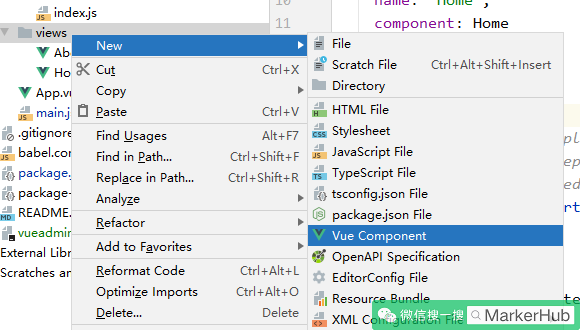 然后再路由中心配置配置url与vue页面的映射关系,参考原本的默认写法,我们很容易写出以下代码: * src\router\index.js ```plain import Vue from 'vue' import VueRouter from 'vue-router' import Login from "../views/Login"; Vue.use(VueRouter) const routes = [ { path: '/index', name: 'Index', component: () => import('../views/Index.vue') }, { path: '/login', name: 'Login', component: Login } ] const router = new VueRouter({ mode: 'history', base: process.env.BASE_URL, routes }) export default router ``` 得到效果如下: 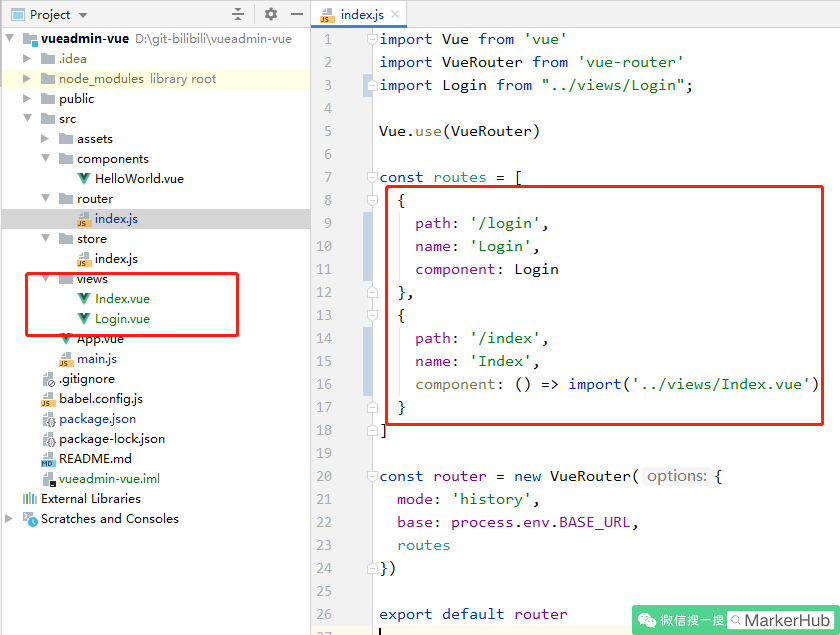 通过npm run serve运行项目,打开[http://localhost:8080/login](http://localhost:8080/login?fileGuid=HXqVy6jx8qkWKPJq)发现页面长这样,明显我们新建的Login.vue里面是没有内容的,但这里有个Home|About,明显是被其他地方嵌套过来的,这是啥原因呢?  这里解释一下,我们新建的Vue项目,如果没其他配置,那么默认的就是一个单页面应用,也就是说这个应用是由一个外壳页面和多个页面片段组成的,页面跳转的时候其实始终都没有离开外壳页面,替换的只是加载的页面片段而已。 那么对应到我们的vueadmin项目,外壳页面就是App.vue,片段页面就是Login.vue,所以我们刚刚通过/login链接看到的页面效果就是App.vue+Login.vue的结果。所以我们进入App.vue页面看看: * src/App.vue 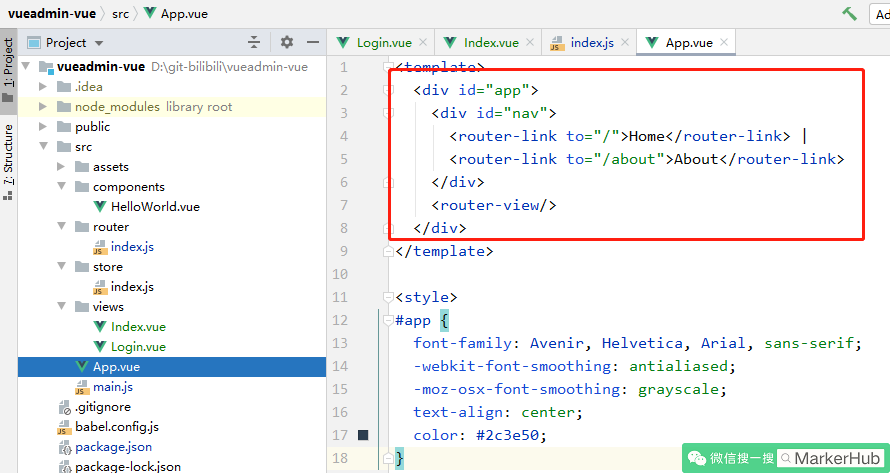 果然我们在template标签中找到了相关的html,我们把id为nav的这个div直接删除不要了。这个<router-view/>在这里就是现实我们链接到的片段页面,也就是Login.vue。所以这样就清晰了,我们输入url的时候会调整到App.vue,然后路由会匹配到我们对应的vue页面,这样完成的页面就渲染出来了。 然后我们再调整一下全局的样式,具体代码如下: * src/App.vue ```plain <template> <div id="app"> <router-view/> </div> </template> <style> html, body, #app { font-family: 'Helvetica Neue', 'Hiragino Sans GB', 'WenQuanYi Micro Hei', 'Microsoft Yahei', sans-serif; height: 100%; padding: 0; margin: 0; font-size: 15px; } </style> ``` ## 6. 登陆界面开发 ok,万事具备,接下来我们来开发我们第一个页面Login.vue([http://localhost:8080/login](http://localhost:8080/login?fileGuid=HXqVy6jx8qkWKPJq)),目前页面是完全空白的。一般登录页面就一个简单的表单:用户名、登录密码和验证码。然后我还想在表单左边添加一个图片,是我自己的公众号的二维码,然后中间用一条竖线分开。 一开始的时候为了页面风格的统一,我们采用了Element Ui的组件库,所以这里我们就直接去element的官网。上面描述中我们需要左右分开显示,所以先找到Loyout布局然后再弄表单,然后我们涉及到的后台交互有2个: * 获取登录验证码 * 提交登录表单完成登录 因为后台系统我们暂时还没有开发,所以这里我们需要自己mock数据完成交互。前面我们已经引入了mockjs,所以我们到mock.js文件中开发我们的api。 #### 登录交互过程 我们梳理一下交互流程: 1. 浏览器打开登录页面 2. 动态加载登录验证码,因为这是前后端分离的项目,我们不再使用session进行交互,所以后端我打算禁用session,那么验证码的验证就是问题了,所以后端设计上我打算生成验证码同时生成一个随机码,随机码作为key,验证码为value保存到redis中,然后把随机码和验证码图片的Base64字符串码发送到前端 3. 前端提交用户名、密码、验证码还有随机码 4. 后台验证验证码是否匹配以及密码是否正确 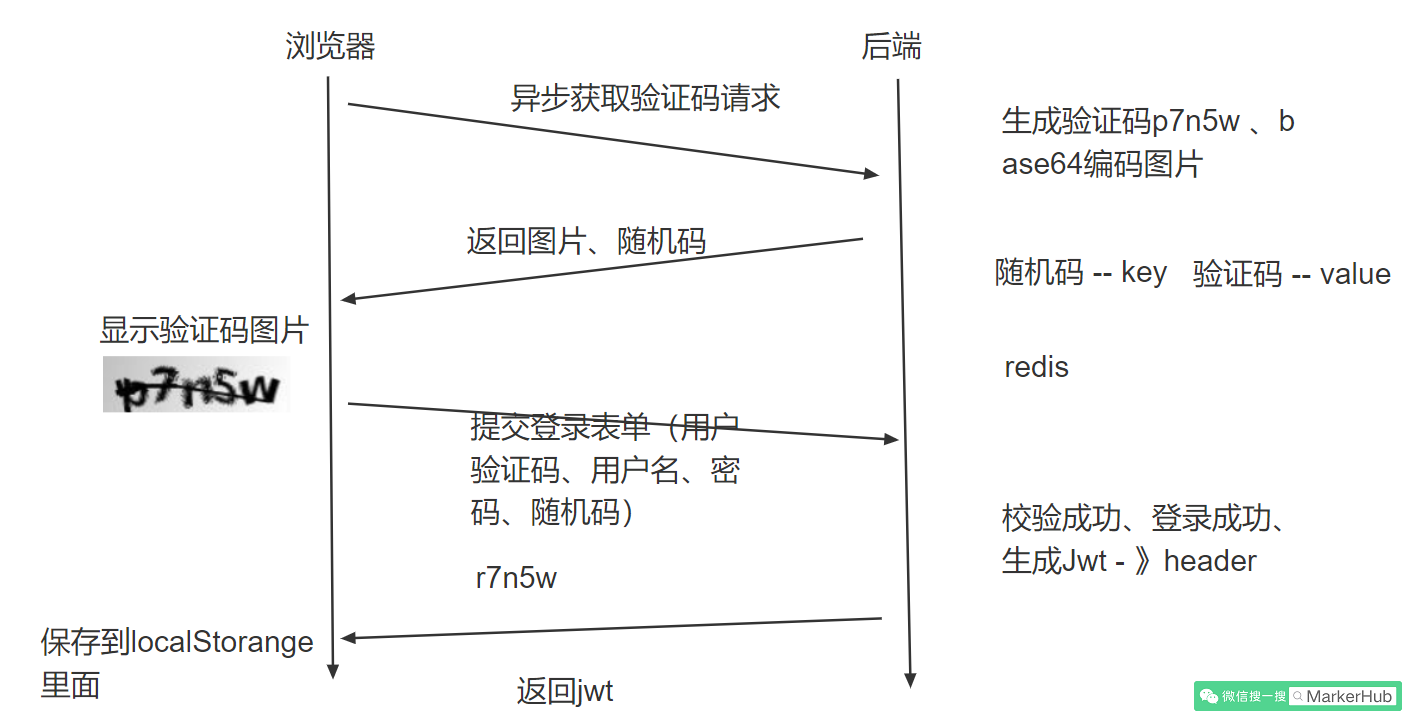 ok,这样我们就知道mock应该弄成什么样的api了。 * mock.js - 获取登录验证码 ```plain // 引入mockjs const Mock = require('mockjs') // 获取 mock.Random 对象 // 参考:https://github.com/nuysoft/Mock/wiki/Mock.Random const Random = Mock.Random let Result = { code: 200, msg: '操作成功', data: null } /** * Mock.mock( url, post/get , function(options)); * url 表示需要拦截的 URL, * post/get 需要拦截的 Ajax 请求类型 * * 用于生成响应数据的函数 */ // 获取验证码图片base64编码以及一个随机码 Mock.mock('/captcha', 'get', () => { Result.data = { token: Random.string(32), // 获取一个32位的随机字符串, captchaImg: Random.dataImage( "120x40", "11111" ) //生成验证码为11111的base64图片编码 } return Result }) ``` mock生成数据还算简单,一般都是利用Mock.Random对象来生成一些随机数据,具体的用法可以参考https://github.com/nuysoft/Mock/wiki/Mock.Random。然后Result是为了统一返回结果,因为后台设计的时候,前后端交互,一般都有固定的返回格式,所以就有了Result。 * mock.js - 登录接口 ```plain // 因为mock不认识/login?username=xxx,所以用了正则表达式 Mock.mock(RegExp('/login*'), 'post', (config) => { // 这里无法在header添加authorization,直接跳过 console.log("mock----------------login") return Result }) ``` Mock我们不需要什么处理,只需要放回的数据符合前端的要求就行哈。这样我们前端就可以继续往后面开发。 然后编写登录页面的js * src/views/Login.vue ```plain <template> <el-row type="flex" class="row-bg" justify="center"> <el-col :xl="6" :lg="7"> <div class="login-form"> <h2>欢迎来到VueAdmin管理系统</h2> <el-image style="width: 180px; height: 180px" :src="require('@/assets/markerhub/MarkerHub.jpg')" ></el-image> <p> 公众号 MarkerHub </p> <p> 扫码二维码,回复【VueAdmin】获取登录密码 </p> </div> </el-col> <el-col :span="1"> <el-divider direction="vertical"></el-divider> </el-col> <el-col :xl="6" :lg="7"> <el-form label-position="right" :rules="rules" label-width="80px" :model="loginForm" ref="loginForm"> <el-form-item label="用户名" prop="username" style="width: 380px;"> <el-input v-model="loginForm.username"></el-input> </el-form-item> <el-form-item label="密码" prop="password" style="width: 380px;"> <el-input type="password" v-model="loginForm.password"></el-input> </el-form-item> <el-form-item label="验证码" prop="code" style="width: 380px;"> <el-input v-model="loginForm.code" style="width: 172px; float: left;" maxlength="5"></el-input> <el-image class="captchaImg" :src="captchaImg" @click="getCaptcha"></el-image> </el-form-item> <el-form-item> <el-button type="primary" @click="submitForm('loginForm')">提交</el-button> <el-button @click="getPass">获取密码</el-button> </el-form-item> </el-form> </el-col> </el-row> </template> import qs from 'qs' export default { name: "Login", data() { return { loginForm: { username: 'admin', password: 'markerhub', code: '11111', token: '', }, rules: { username: [ {required: true, message: '请输入用户名', trigger: 'blur'} ], password: [ {required: true, message: '请输入密码', trigger: 'blur'} ], code: [ {required: true, message: '请输入验证码', trigger: 'blur'}, {min: 5, max: 5, message: '验证码为5个字符', trigger: 'blur'} ], }, captchaImg: '' } }, methods: { submitForm(formName) { this.$refs[formName].validate((valid) => { if (valid) { this.$axios.post('/login?' + qs.stringify(this.loginForm)).then(res => { console.log(res.data) const jwt = res.headers['authorization'] // 将jwt存储到应用store中 this.$store.commit("SET_TOKEN", jwt) this.$router.push("/index") }).catch(error => { this.getCaptcha(); console.log('error submit!!'); }) } else { this.getCaptcha(); console.log('error submit!!'); return false; } }); }, resetForm(formName) { this.$refs[formName].resetFields(); }, getPass() { this.$message("请扫描左边的二维码,回复【VueAdmin】获取登录密码"); }, getCaptcha() { this.$axios.get('/captcha').then(res => { this.loginForm.token = res.data.data.token this.captchaImg = res.data.data.captchaImg }) } }, created() { this.getCaptcha() } } <style scoped> .el-col { display: flex; justify-content: center; align-items: center; height: 100%; text-align: center; } .el-row { height: 100%; background-color: #fafafa; } .el-divider { height: 200px; } .captchaImg { float: left; margin-left: 8px; border-radius: 4px; } </style> ``` 配合一点样式的调整,这样登录界面我们就开发完毕啦,如果觉得不清楚,可以去看开发视频哈,一步一步的教学,写文字毕竟讲述还是不够仔细的。 #### token的状态同步 再讲一下,submitForm方法中,提交表单之后做了几个动作,从Header中获取用户的authorization,也就是含有用户登录信息的jwt,然后提交到store中进行状态管理。this.$store.commit("SET_TOKEN", jwt)表示调用store中的SET_TOKEN方法,所以我们需要在store中编写方法: * src/store/index.js ```plain export default new Vuex.Store({ state: { token: '' }, mutations: { SET_TOKEN: (state, token) => { state.token = token localStorage.setItem("token", token) } }, modules: { } }) ``` 这样登录之后获取到的jwt就可以存储到应用的store以及**localStorage**中,方便使用直接从**localStorage**中获取即可! 这样用户登录成功之后就会跳转到/index页面this.$router.push("/index")。 #### 定义全局axios拦截器 这里有个问题,那么如果登录失败,我们是需要弹窗显示错误的,比如验证码错误,用户名或密码不正确等。不仅仅是这个登录接口,所有的接口调用都会有这个情况,所以我们想做个拦截器,对返回的结果进行分析,如果是异常就直接弹窗显示错误,这样我们就省得每个接口都写一遍了。 在src目录下创建一个文件axios.js(与main.js同级),定义axios的拦截: * src/axios.js ```plain import axios from "axios"; import Element from 'element-ui' import router from "./router"; axios.defaults.baseURL = "http://localhost:8081" const request = axios.create({ timeout: 5000, headers: { 'Content-Type': 'application/json; charset=utf-8' } }) request.interceptors.request.use(config => { config.headers['Authorization'] = localStorage.getItem("token") // 请求头带上token return config }) request.interceptors.response.use(response => { let res = response.data; console.log("response") console.log(res) if (res.code === 200) { return response } else { Element.Message.error(res.msg? res.msg : '系统异常!', {duration: 3 * 1000}) return Promise.reject(response.data.msg) } }, error => { console.log(error) if(error.response.data) { error.message = error.response.data.msg } if(error.response.status === 401) { router.push("/login") } Element.Message.error(error.message, {duration: 3 * 1000}) return Promise.reject(error) } ) export default request ``` 前置拦截,其实可以统一为所有需要权限的请求装配上header的token信息,后置拦截中,判断status.code和error.response.status,如果是401未登录没权限的就调到登录页面,其他的就直接弹窗显示错误。 然后再main.js中导入axios.js ```plain import request from "./axios"; Vue.prototype.$axios = request ``` 同时,记得去掉我们之前添加的 ```plain import axios from 'axios' Vue.prototype.$axios = axios // ``` 这样axios每次请求都会被前置拦截器和后置拦截器拦截了。 登录异常弹窗效果如下: 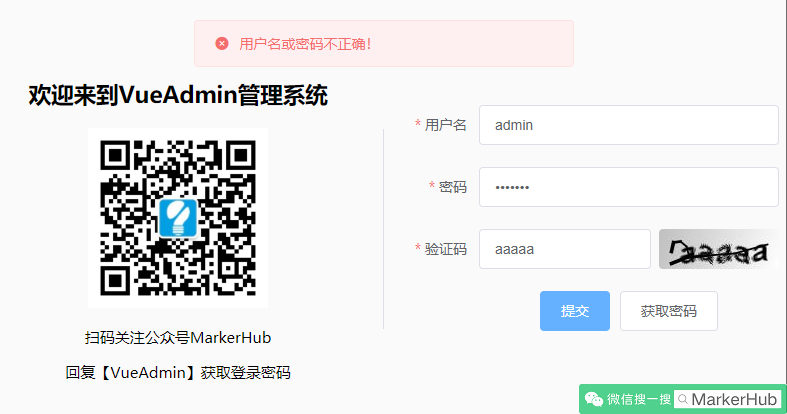 ## 7. 后台管理界面开发 ok,登录界面我们已经开发完毕,并且我们已经能够进入管理系统的首页了,接下来我们就来开发首页的页面。 一般来说,管理系统的页面我们都是头部是一个简单的信息展示系统名称和登录用户信息,然后中间的左边是菜单导航栏,右边是内容,对应到elementui的组件中,我们可以找到这个Container 布局容器用于布局,方便快速搭建页面的基本结构。 而我们采用这个布局: 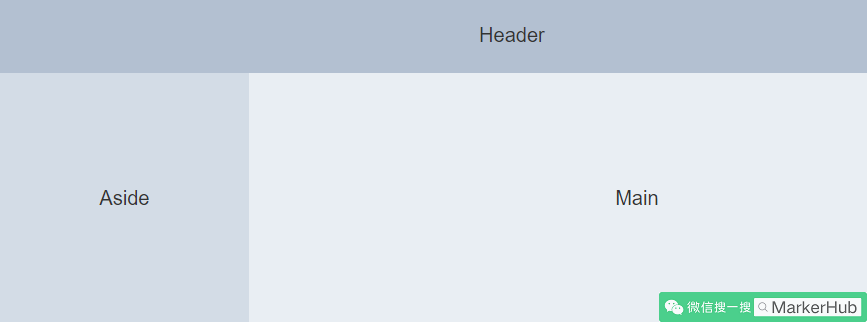 而这个页面,一般来说Header和Aside都是不会变化的,只有Main部分会跟着链接变化而变化,所以我们可以提炼公共部分出来,放在Home.vue中,然后Main部分放在Index.vue中, 那么问题来了,我们如何才能做到点击左边的Aside,然后局部刷新Main中的内容呢?在Vue中,我们可以通过嵌套路由(子路由)的形式。也就是我们需要重新定义路由,一级路由是Home.vue,Index.vue是作为Home.vue页面的子路由,然后Home.vue中我们通过<router-view>来展示Index.vue的内容即可。 在router中,我们这样修改: * src/router/index.js ```plain const routes = [ { path: '/', name: 'Home', component: Home, children: [ { path: '/index', name: 'Index', meta: { title: "首页" }, component: () => import('@/views/Index.vue') } ] }, { path: '/login', name: 'Login', component: Login }, ] ``` 可以看到原本的Index已经作为了Home的children,所以在链接到/index的时候我们会展示父级Home的内容,然后再显示Index内容。 * src/views/Home.vue ```plain <template> <el-container> <el-aside width="200px"> <div>菜单栏</div> </el-aside> <el-container> <el-header style="height: 55px;"> <Strong>ManHub后台管理系统</Strong> <div class="header-avatar block"> <el-avatar class="el-avatar" size="medium" :src="userInfo.avatar"></el-avatar> <el-dropdown> <span class="el-dropdown-link"> {{userInfo.username}}<i class="el-icon-arrow-down el-icon--right"></i> </span> <el-dropdown-menu slot="dropdown"> <el-dropdown-item :underline="false"> <router-link :to="{name: 'UserCenter'}">个人中心</router-link> </el-dropdown-item> <el-dropdown-item @click.native="logout">退出</el-dropdown-item> </el-dropdown-menu> </el-dropdown> <el-link href="https://space.bilibili.com/13491144">视频讲解</el-link> <el-link href="http://markerhub.com">网站</el-link> </div> </el-header> <el-main> <div style="margin: 0 15px;"> <router-view></router-view> </div> </el-main> </el-container> </el-container> </template> export default { name: "Home.vue", data() { return { userInfo: { id: '-1', username: 'admin', avatar: 'https://image-1300566513.cos.ap-guangzhou.myqcloud.com/upload/images/5a9f48118166308daba8b6da7e466aab.jpg' } } }, } ``` 样式部分我就不贴出来了,看git上的代码哈。 首页中间内容,不知道放啥,就放我的公众号二维码吧,哈哈,欢迎关注关注! * src/views/Index.vue ```plain <template> <div style="text-align: center;"> <h2></h2> <el-image style="width: 180px; height: 180px" :src="require('@/assets/markerhub/javacat.jpg')" ></el-image> <p> 更多项目学习,扫描关注公众号! </p> </div> </template> ``` 总体下来效果如下: 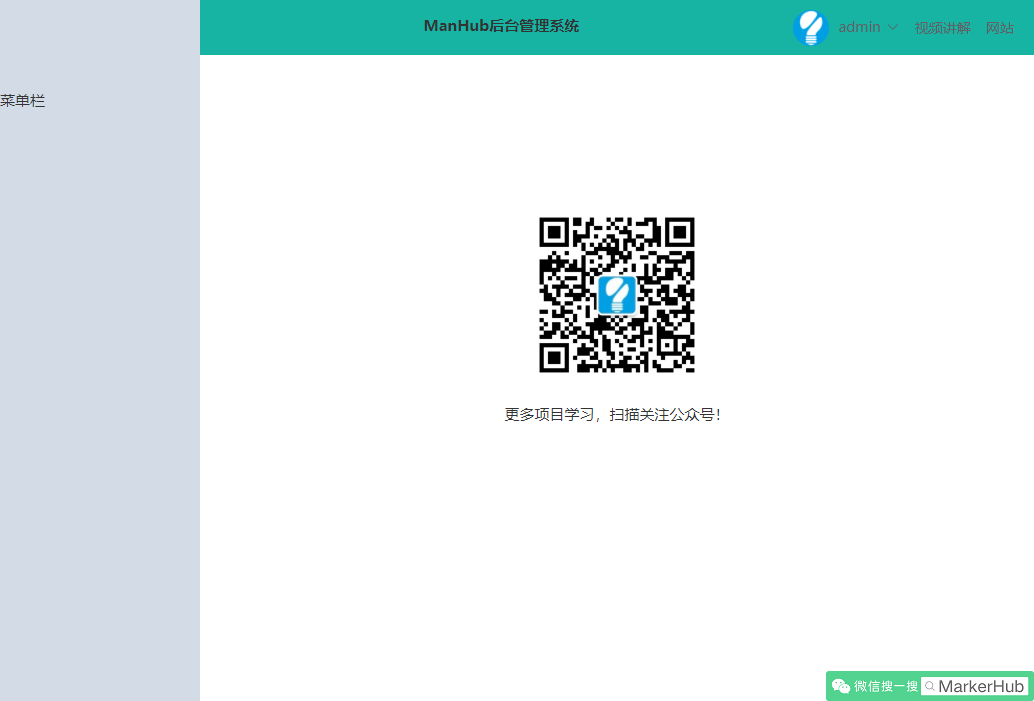 有点感觉了,然后昨天的菜单栏我们也弄下,我们找到NavMenu 导航菜单组件,然后加到Home.vue中,因为考虑到后面我们需要做动态菜单,所以我想单独这个页面出来,因此我新建了个SideMenu.vue: ```plain <template> <el-menu class="el-menu-vertical-demo" background-color="#545c64" text-color="#fff" active-text-color="#ffd04b" > <router-link to="/index"> <el-menu-item index="Index"> <template slot="title"> <i class="el-icon-s-home"></i> <span slot="title">首页</span> </template> </el-menu-item> </router-link> <el-submenu index="1"> <template slot="title"> <i class="el-icon-s-operation"></i> <span>系统管理</span> </template> <el-menu-item index="1-1"> <template slot="title"> <i class="el-icon-s-custom"></i> <span slot="title">用户管理</span> </template> </el-menu-item> <el-menu-item index="1-2"> <template slot="title"> <i class="el-icon-rank"></i> <span slot="title">角色管理</span> </template> </el-menu-item> <el-menu-item index="1-3"> <template slot="title"> <i class="el-icon-menu"></i> <span slot="title">菜单管理</span> </template> </el-menu-item> </el-submenu> <el-submenu index="2"> <template slot="title"> <i class="el-icon-s-tools"></i> <span>系统工具</span> </template> <el-menu-item index="2-2"> <template slot="title"> <i class="el-icon-s-order"></i> <span slot="title">数字字典</span> </template> </el-menu-item> </el-submenu> </el-menu> </template> export default { name: "SideMenu", data() { } } <style scoped> .el-menu-vertical-demo { height: 100%; } a{ text-decoration:none; } </style> ``` SideMenu.vue作为一个组件添加到Home.vue中,我们首选需要导入,然后声明compoents,然后才能使用标签,所以在Home.vue中代码如下: ```plain <template> <el-container> <el-aside width="200px"> <SideMenu></SideMenu> </el-aside> <el-container> ... </el-container> </el-container> </template> import SideMenu from "./inc/SideMenu"; export default { name: "Home.vue", components: { SideMenu }, data() { ... }, } ``` 注意SideMenu出现的地方哈,最后效果如下:  这就很接近我们想要的效果了哈。 我们先来新建几个页面,先在views下新建文件夹sys,然后再新建vue页面,具体看下面,这样我们就能把链接和页面可以连接起来。 * src\views\sys * Dict.vue 数字字典 * Menu.vue 菜单管理 * Role.vue 角色管理 * User.vue 用户管理 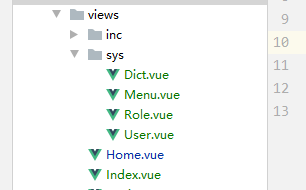 虽然建立了页面,但是因为我们没有在router中注册链接与组件的关系,所以我们现在打开链接还是打开不了页面的。下面我们就要动态联系起来。 ## 8. 用户登录信息展示 管理界面的右上角的用户信息现在是写死的,因为我们现在已经登录成功,所以我们可以通过接口去请求获取到当前的用户信息了,这样我们就可以动态显示用户的信息,这个接口比较简单,然后退出登录的链接也一起完成,就请求接口同时把浏览器中的缓存删除就退出了哈。 * src\views\Home.vue ```plain <el-header style="height: 55px;"> <Strong>ManHub后台管理系统</Strong> <div class="header-avatar block"> <el-avatar class="el-avatar" size="medium" :src="userInfo.avatar"></el-avatar> <el-dropdown> <span class="el-dropdown-link"> {{userInfo.username}}<i class="el-icon-arrow-down el-icon--right"></i> </span> <el-dropdown-menu slot="dropdown"> <el-dropdown-item :underline="false"> <router-link :to="{name: 'UserCenter'}">个人中心</router-link> </el-dropdown-item> <el-dropdown-item @click.native="logout">退出</el-dropdown-item> </el-dropdown-menu> </el-dropdown> <el-link >视频讲解</el-link> <el-link>公众号</el-link> </div> </el-header> ... data() { return { userInfo: { id: '', username: '', avatar: '' } } }, created() { this.getUserInfo() }, methods: { getUserInfo() { this.$axios.get("/sys/userInfo").then(res => { this.userInfo = res.data.data; }) }, logout() { this.$axios.post("/logout").then(res => { console.log(res.data.data) localStorage.clear() sessionStorage.clear() this.$store.commit("resetState") this.$router.push("/login") }) } } ``` 记得mockjs中返回用户的信息,比较简单我就不写了这个。 ## 9. 动态菜单栏开发 上面代码中,左侧的菜单栏的数据是写死的,在实际场景中我们不可能这样做,因为菜单是需要根据登录用户的权限动态显示菜单的,也就是用户看到的菜单栏可能是不一样的,这些数据需要去后端访问获取。 首先我们先把写死的数据简化成一个json数组数据,然后for循环展示出来,代码如下: * /src/views/inc/SideMenu.vue ```plain <template> <el-menu class="el-menu-vertical-demo" background-color="#545c64" text-color="#fff" active-text-color="#ffd04b" > ... <el-submenu default-active="Index" :index="menu.name" v-for="menu in menuList"> <template slot="title"> <i :class="menu.icon"></i> <span>{{menu.title}}</span> </template> <router-link :to="item.path" v-for="item in menu.children"> <el-menu-item :index="item.name"> <template slot="title"> <i :class="item.icon"></i> <span slot="title">{{item.title}}</span> </template> </el-menu-item> </router-link> </el-submenu> </el-menu> </template> export default { name: "SideMenu", data() { return { menuList: [ { name: 'SysManga', title: '系统管理', icon: 'el-icon-s-operation', path: '', component: '', children: [ { name: 'SysUser', title: '用户管理', icon: 'el-icon-s-custom', path: '/sys/users', children: [] } ] }, { name: 'SysTools', title: '系统工具', icon: 'el-icon-s-tools', path: '', children: [ { name: 'SysDict', title: '数字字典', icon: 'el-icon-s-order', path: '/sys/dicts', children: [] }, ] } ], } } } ``` 可以看到,我用for循环显示数据,那么这样变动菜单栏时候只需要修改data中的menuList即可。效果和之前的完全一样。 现在menuList的数据我们是直接写到页面data上的,一般我们是要请求后端的,所以这里我们定义一个mock接口,因为是动态菜单,一般我们也要考虑到权限问题,所以我们请求数据的时候一般除了动态菜单,还要权限的数据,比如菜单的添加、删除是否有权限,是否能显示该按钮等,有了权限数据我们就定动态决定是否展示这些按钮了。 * src/mock.js ```plain Mock.mock('/sys/menu/nav', 'get', () => { // 菜单json let nav = [ { name: 'SysManga', ... }, { name: 'SysTools', ... } ] // 权限数据 let authoritys = ['SysUser', "SysUser:save"] Result.data = {} Result.data.nav = nav Result.data.authoritys = authoritys return Result }) ``` 上面json数据太长,所以我部分用省略号...替代了,以后的代码也会这样哈。 这样我们就定义好了导航菜单的接口,什么时候调用呢?应该登录成功完成之后调用,但是并不是每一次打开我们都需要去登录,也就是浏览器已经存储到用户token的时候我们不需要再去登录的了,所以我们不能放在登录完成的方法里。那么是当前这个Home.vue页面吗?看起来没什么问题,方正每次都会进入这个页面,然后搞个开关控制是否重新加载就行? 我们这里还要考虑一个问题,就是导航菜单的路由问题,啥意思?就是点击菜单之后路由到哪个页面是需要在router中声明的。 这个路由问题我提供两个解决方案: * 1、全部写死,也就是提前写好所有的路由,不管用户有没有权限,后面在通过权限数据来判断用户是否有权限访问路由。 * 2、动态渲染,就是把加载到的导航菜单数据动态绑定路由 这里我们使用第二种解决方案,这类简单点,后续我们再开发页面的时候就不需要去改动路由,可以动态绑定。 综上,我们把加载菜单数据这个动作放在router.js中。Router有个前缀拦截,就是在路由到页面之前我们可以做一些判断或者加载数据。 在router.js中添加一下代码: * src/router/index.js ```plain router.beforeEach((to, from, next) => { let hasRoute = store.state.menus.hasRoute let menus = store.state.menus.menuList let token = localStorage.getItem("token") if (to.path == '/login') { console.log("login!!!!!!!!!!!") next() } else if (!token) { console.log("还没有token!!!") next({path: "/login"}) }else if (to.path == '/' || to.path == '') { next({path: "/index"}) }else if (!hasRoute) { let newRoutes = router.options.routes; axios.get("/sys/menu/nav", {headers:{ Authorization: localStorage.getItem("token") }}).then(res => { console.log(res.data.data) store.commit("setMenuList", res.data.data.nav) store.commit("setPermList", res.data.data.authoritys) res.data.data.nav.forEach(menu => { if (menu.children) { menu.children.forEach(e => { let route = menuToRoute(e) if(route) { newRoutes[0].children.push(route) } }) } }) console.log("oldRoutes---------------") console.log(newRoutes) router.addRoutes(newRoutes) store.commit("changeRouteStatus", true) next({path: to.path}) }) } else { console.log("已经有路由了------------") next() } }) const menuToRoute = (menu) => { console.log("正在添加menu--》") console.log(menu) if (!menu.component) { return null } // 复制属性 let route = { name: menu.name, path: menu.path, meta: { icon: menu.icon, title: menu.title } } route.component = () => import('@/views/' + menu.component +'.vue') return route } export default router ``` 可以看到,我们通过menuToRoute就是把menu数据转换成路由对象,然后router.addRoutes(newRoutes)动态添加路由对象。 同时上面的menu对象中,有个menu.component,这个就是连接对应的组件,我们需要添加上去,比如说/sys/users链接对应到component(sys/User)。这样我们才能绑定添加到路由。所以我会修改mock中的nav的数据成这样: ```plain let nav = [ { "id": 1, "title": "系统管理", "icon": "el-icon-s-operation", "path": "", "name": "sys:manage", "component": "", "children": [ { "id": 2, "title": "用户管理", "icon": "el-icon-s-custom", "path": "/sys/users", "name": "sys:user:list", "component": "sys/User", "children": [] }, { "id": 3, "title": "角色管理", "icon": "el-icon-rank", "path": "/sys/roles", "name": "sys:role:list", "component": "sys/Role", "children": [] }, { "id": 4, "title": "菜单管理", "icon": "el-icon-menu", "path": "/sys/menus", "name": "sys:menu:list", "component": "sys/Menu", "children": [] } ] }, { "id": 5, "title": "系统工具", "icon": "el-icon-s-tools", "path": "", "name": "sys:tools", "component": null, "children": [ { "id": 6, "title": "数字字典", "icon": "el-icon-s-order", "path": "/sys/dicts", "name": "sys:dict:list", "component": "sys/Dict", "children": [] } ] } ] ``` 同时上面router中我们还通过判断是否登录页面,是否有token等判断提前判断是否能加载菜单,同时还做了个开关hasRoute来动态判断是否已经加载过菜单。 还需要在store中定义几个方法用于存储数据,我们定义一个menu模块,所以在store中新建文件夹modules,然后新建menus.js * src/store/modules/menus.js ```plain import Vue from 'vue' import Vuex from 'vuex' Vue.use(Vuex) export default { state: { // 菜单栏数据 menuList: [], // 权限数据 permList: [], hasRoute: false }, mutations: { changeRouteStatus(state, hasRoute) { state.hasRoute = hasRoute sessionStorage.setItem("hasRoute", hasRoute) }, setMenuList(state, menus) { state.menuList = menus }, setPermList(state, authoritys) { state.permList = authoritys } } } ``` 记得在store中import这个模块,然后添加到modules: * src/store/index.js ```plain import menus from "./modules/menus" ... export default new Vuex.Store({ ... modules: { menus } }) ``` 这样我们菜单的数据就可以加载了,然后再SideMenu.vue中直接获取store中的menuList数据即可显示菜单出来了。 * src/views/inc/SideMenu.vue ```plain data() { return { menuList: this.$store.state.menus.menuList, } } ``` 最后效果如下: 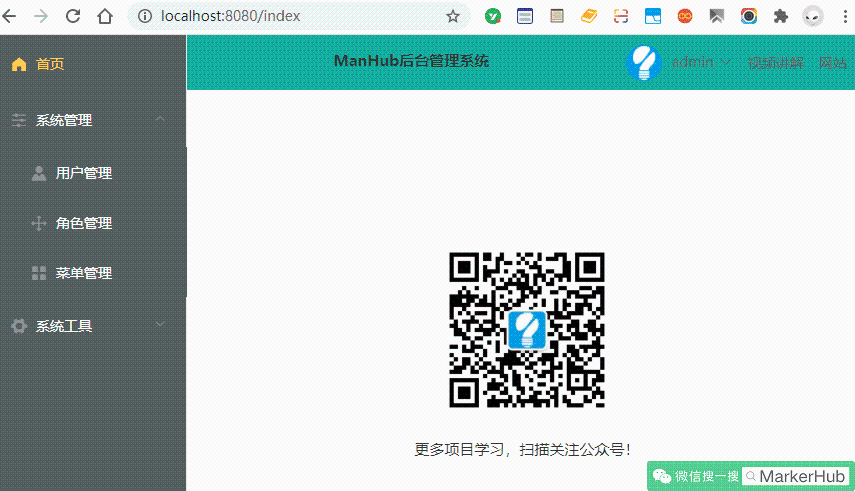 好了,好像已经有点完善了哈哈。 ## 10. 动态标签页开发 上面做完之后,总还觉得少点什么,对了标签页,我看别的后台管理系统都有这个,效果是这样的: 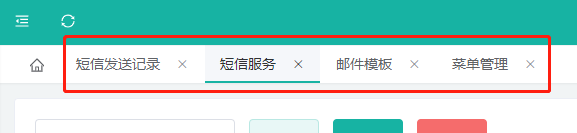 搞起搞起,别人有我不能没有,于是我去element-ui中寻了一圈,发现Tab标签页组件挺符合我们要求的,可以动态增减标签页。 理想的动作是这样的: 1. 当我们点击导航菜单,上方会添加一个对应的标签,注意不能重复添加,发现已存在标签直接切换到这标签即可 2. 删除当前标签的时候会自动切换到前一个标签页 3. 点击标签页的时候会调整到对应的内容页中 综合Vue的思想,我们可以这样设计:在Store中统一存储:1、当前标签Tab,2、已存在的标签Tab列表,然后页面从Store中获取列表显示,并切换到当前Tab即可。删除时候我们循环当前Tab列表,剔除Tab,并切换到指定Tab。 我们先和左侧菜单一样单独定义一个组件Tabs.vue放在views/inc文件夹内: * src/views/inc/Tabs.vue ```plain <template> <el-tabs v-model="editableTabsValue" type="card" closable @tab-remove="removeTab" @tab-click="clickTab"> <el-tab-pane v-for="item in editableTabs" :key="item.name" :label="item.title" :name="item.name" > </el-tab-pane> </el-tabs> </template> export default { name: "Tabs", data() { return { } }, computed: { editableTabs: { get() { return this.$store.state.menus.editableTabs; }, set(val) { this.$store.state.menus.editableTabs = val } }, editableTabsValue: { get() { return this.$store.state.menus.editableTabsValue; }, set(val) { this.$store.state.menus.editableTabsValue = val; } } }, methods: { clickTab(target) { this.$router.push({name: target.name}) }, removeTab(targetName) { let tabs = this.editableTabs; let activeName = this.editableTabsValue; // 首页不能删除 if (targetName === "Index") { return } if (activeName === targetName) { tabs.forEach((tab, index) => { if (tab.name === targetName) { let nextTab = tabs[index + 1] || tabs[index - 1]; if (nextTab) { activeName = nextTab.name; } } }); } this.editableTabsValue = activeName; this.editableTabs = tabs.filter(tab => tab.name !== targetName); this.$router.push({name: activeName}) } } } ``` 上面代码中,computed表示当其依赖的属性的值发生变化时,计算属性会重新计算,反之,则使用缓存中的属性值。这样我们就可以实时监测Tabs标签的动态变化实时显示(相当于实时get、set)。其他clickTab、removeTab的逻辑其实也还算简单,特别是removeTab注意考虑多种情况就可以。 然后我们来到store中的menu.js,我们添加 editableTabsValue和editableTabs,然后把首页作为默认显示的页面。 * src/store/modules/menus.js ```plain state: { // 菜单栏数据 menuList: [], // 权限数据 permList: [], hasRoute: false, editableTabsValue: 'Index', editableTabs: [ { title: '首页', name: 'Index' } ], }, ``` ok,然后再Home.vue中引入我们Tabs.vue这个组件,添加代码的地方比较零散,所以我就写重要代码出来就好,自行添加到指定的地方哈。 * src/views/Home.vue ```plain # 引入组件 import Tabs from "./inc/Tabs" # 声明组件 components: { SideMenu, Tabs }, <el-main> # 使用组件 <Tabs></Tabs> <div style="margin: 0 15px;"> <router-view></router-view> </div> </el-main> ``` 最后效果如下: 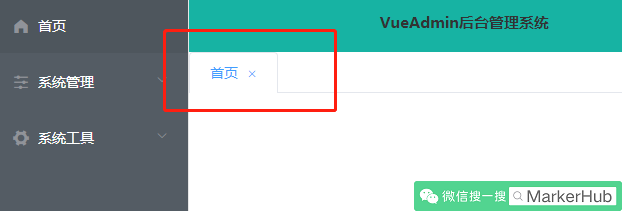 好了完成了第一步了,现在我们需要点击菜单导航,然后再tabs列表中添加tab标签页,那么我们来到SideMenu.vue,我们给el-menu-item每个菜单都添加一个点击事件: * src/views/inc/SideMenu.vue ```plain <el-menu # 当前选择的菜单 :default-active="activeMenu" ... > ... <router-link :to="item.path" v-for="item in menu.children"> <el-menu-item :index="item.name" @click="selectMenu(item)"> ... </el-menu-item> </router-link> computed: { # 选择tab标签时候顺便也要激活当前对应的导航 activeMenu() { return this.$store.state.menus.editableTabsValue } }, methods: { selectMenu(item) { console.log(item) let obj = { name: item.name, title: item.title } this.$store.commit("addTabs", obj) } } ``` 因为tabs标签列表我们是存储在store中的,因此我们需要commit提交事件,因此我们在menu.js中添加addTabs方法: * src/store/modules/menus.js ```plain mutations: { addTabs(state, tab) { console.log(tab) // 判断是否在栈内 let index = state.editableTabs.findIndex(item => item.name === tab.name) if (index === -1) { // 添加到tabs中 state.editableTabs.push(tab) } // 当前激活的tab state.editableTabsValue = tab.name }, setActiveTab(state, tabName) { state.editableTabsValue = tabName }, } ``` 添加tab标签的时候注意需要激活指定当前标签,也就是设置editableTabsValue。然后我们也添加了setActiveTab方法,方便其他地方指定激活某个标签。 具体效果如下: 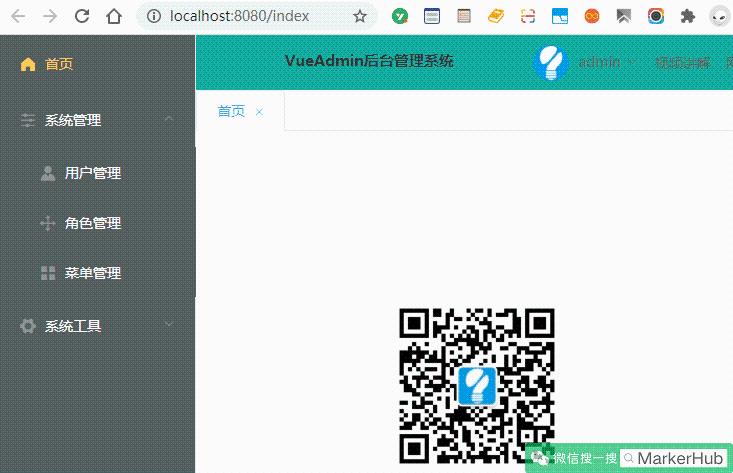 上面的演示看似没什么问题了,但其实细节还是很多的,比如当我们刷新浏览器、或者直接通过输入链接打开页面时候就不会自动帮我们根据链接回显激活Tab。 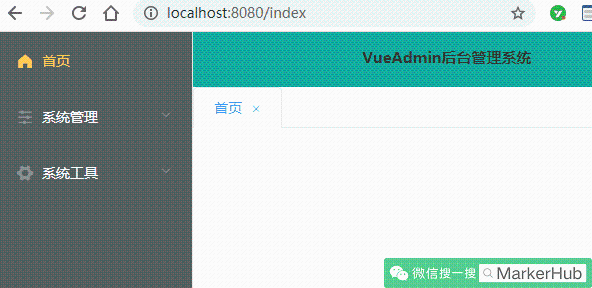 从上面图中我们可以看出刷新浏览器之后链接/sys/users不变,内容不变,但是Tab却不见了,所以我们需要修补一下,当用户是直接通过输入链接形式打开页面的时候我们也能根据链接自动添加激活指定的tab。那么在哪里添加这个回显的方法呢?router中?其实可以,只不过我们需要做判断,因为每次点击导航都会触发router。有没有更简便的方法?有的!因为刷新或者打开页面都是一次性的行为,所以我们可以在更高层的App.vue中做这个回显动作,具体如下: * src\App.vue ```plain <template> <div id="app"> <router-view/> </div> </template> export default { name: "App", watch: { // 解决刷新浏览器没有tab的问题 $route(to, from) { if (to.path != '/login') { let obj = { name: to.name, title: to.meta.title } this.$store.commit("addTabs", obj) } } } } ``` 上面代码可以看到,除了login页面,其他页面都会触发addTabs方法,这样我们就可以添加tab和激活tab了。 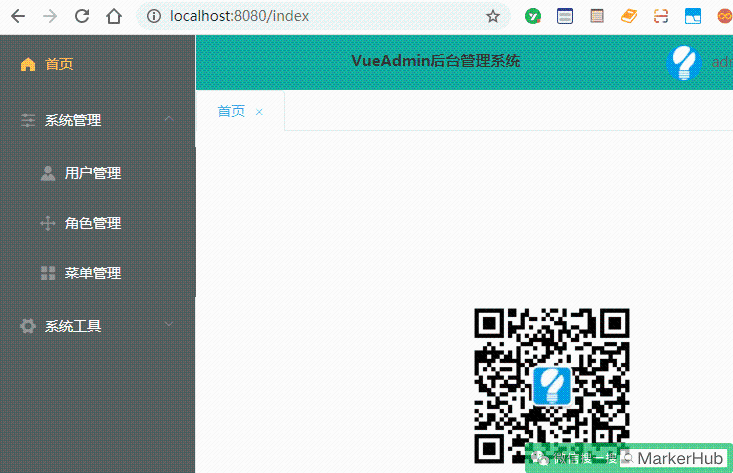 完美搞定! ## 11. 个人中心 个人中心用来展示用户的基本信息和修改密码,相对简单: 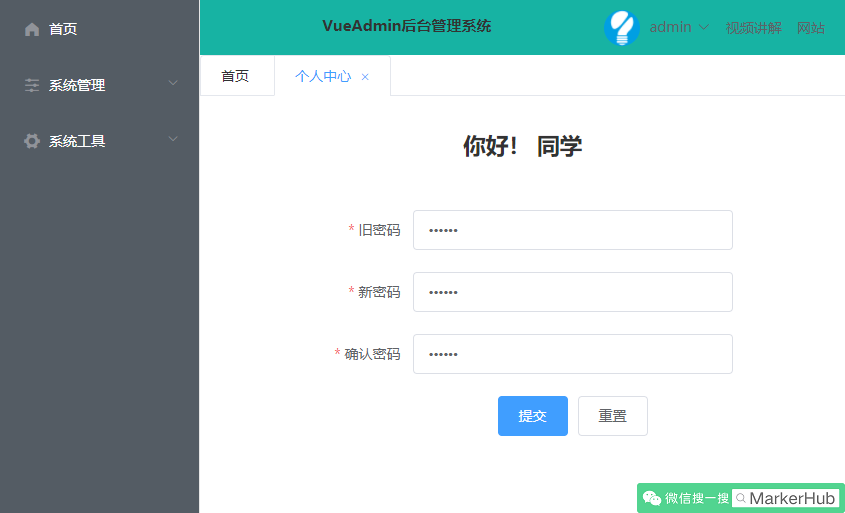 * src/views/UserCenter.vue ```plain <template> <div style="text-align: center;"> <h2>你好!{{ userInfo.username }} 同学</h2> <el-form :model="passForm" status-icon :rules="rules" ref="passForm" label-width="100px"> <el-form-item label="旧密码" prop="currentPass"> <el-input type="password" v-model="passForm.currentPass" autocomplete="off"></el-input> </el-form-item> <el-form-item label="新密码" prop="password"> <el-input type="password" v-model="passForm.password" autocomplete="off"></el-input> </el-form-item> <el-form-item label="确认密码" prop="checkPass"> <el-input type="password" v-model="passForm.checkPass" autocomplete="off"></el-input> </el-form-item> <el-form-item> <el-button type="primary" @click="submitForm('passForm')">提交</el-button> <el-button @click="resetForm('passForm')">重置</el-button> </el-form-item> </el-form> </div> </template> export default { name: "Login", data() { var validatePass = (rule, value, callback) => { if (value === '') { callback(new Error('请再次输入密码')); } else if (value !== this.passForm.password) { callback(new Error('两次输入密码不一致!')); } else { callback(); } }; return { userInfo: { }, passForm: { password: '111111', checkPass: '111111', currentPass: '111111' }, rules: { password: [ { required: true, message: '请输入新密码', trigger: 'blur' }, { min: 6, max: 12, message: '长度在 6 到 12 个字符', trigger: 'blur' } ], checkPass: [ { required: true, validator: validatePass, trigger: 'blur' } ], currentPass: [ { required: true, message: '请输入当前密码', trigger: 'blur' }, ] } } }, created() { this.getUserInfo() }, methods: { getUserInfo() { this.$axios.get("/sys/userInfo").then(res => { this.userInfo = res.data.data; }) }, submitForm(formName) { this.$refs[formName].validate((valid) => { if (valid) { const _this = this this.$axios.post('/sys/user/updataPass', this.passForm).then(res => { _this.$alert(res.data.msg, '提示', { confirmButtonText: '确定', callback: action => { this.$refs[formName].resetFields(); } }); }) } else { console.log('error submit!!'); return false; } }); }, resetForm(formName) { this.$refs[formName].resetFields(); } } } <style scoped> .el-form { width: 420px; margin: 50px auto; } </style> ``` ## 12. 菜单界面 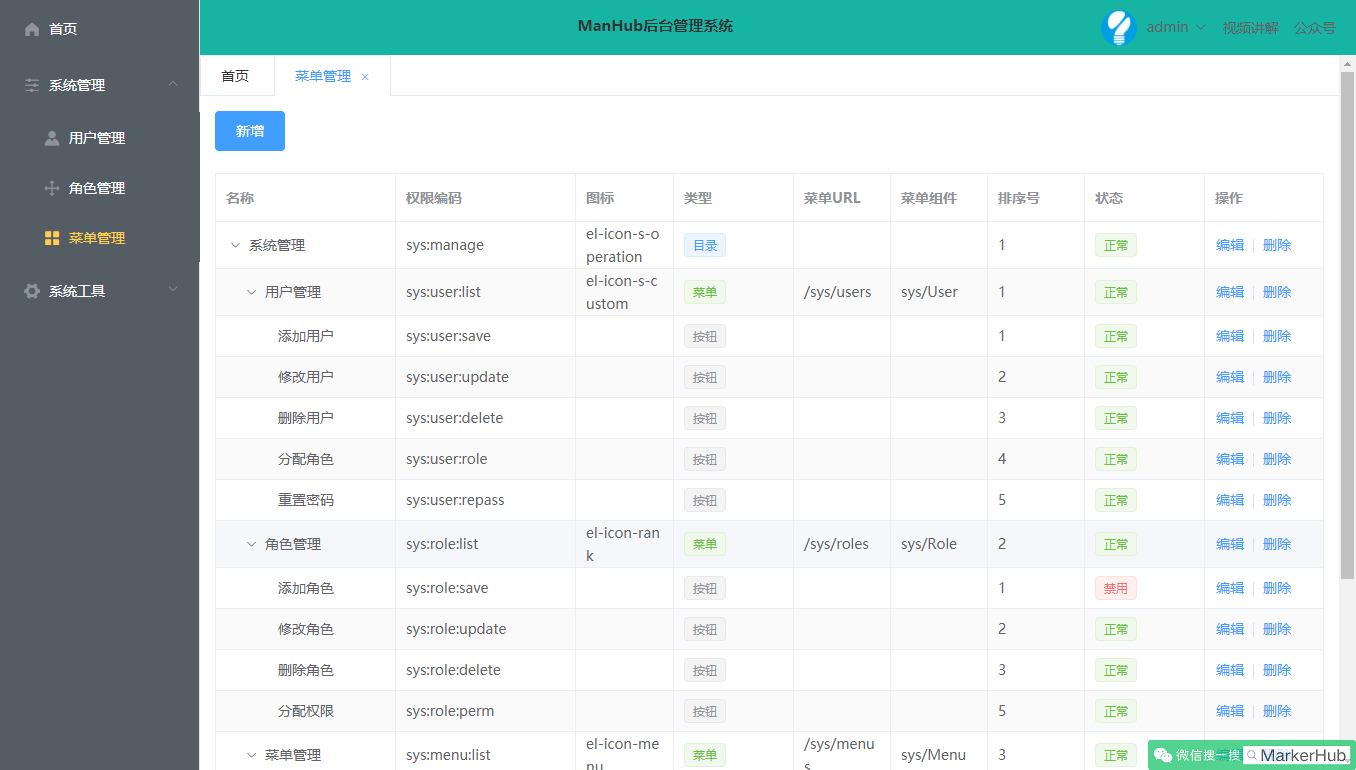 菜单管理我们用到了Table表格组件的树形结构数据,我们只需要根据例子自己组装数据,就可以自动显示出来了,在新增数据的时候有个地方需要讲一下: 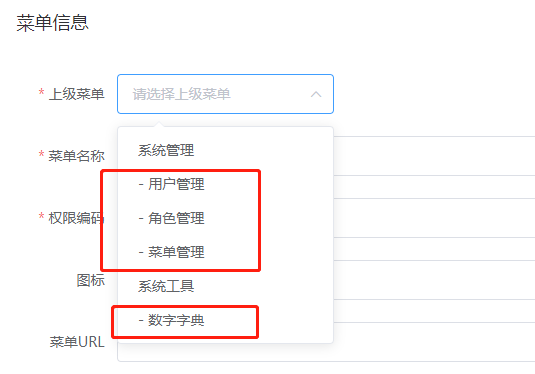 这里本应该是个树形数据的结构,但是现有的elementui不是很满足,于是我就拿了个简单的下拉框,然后子菜单就加上一个【- 】作为前缀,这样看起来就像一个树形结构了,也比较清晰。具体代码如下: * src/views/sys/Menu.vue ```plain <el-form-item label="上级菜单" prop="parentId" label-width="100px"> <!--模拟树形下拉框--> <el-select v-model="editForm.parentId" placeholder="请选择上级菜单" > <template v-for="item in tableData"> <el-option :label="item.name" :value="item.id"></el-option> <template v-for="child in item.children"> <el-option :label="child.name" :value="child.id"> <span>{{ '- ' + child.name }}</span> </el-option> </template> </template> </el-select> </el-form-item> ``` 其他都是基本的增删改查,填数据啥的,就比较繁琐和简单了,贴代码了哈: ```plain <template> <div> <!--搜索框--> <el-form :inline="true" :model="searchForm"> <el-form-item> <el-button type="primary" @click="dialogFormVisible = true" v-if="hasAuth('sys:menu:save')">新增</el-button> </el-form-item> </el-form> <!--列表--> <el-table :data="tableData" style="width: 100%;margin-bottom: 20px;" row-key="id" border stripe default-expand-all :tree-props="{children: 'children', hasChildren: 'hasChildren'}"> <el-table-column prop="name" label="名称" width="180"> </el-table-column> <el-table-column prop="perms" label="权限编码" width="180"> </el-table-column> <el-table-column prop="icon" label="图标"> </el-table-column> <el-table-column prop="type" label="类型" width="120"> <template slot-scope="scope"> <el-tag v-if="scope.row.type === 0" size="small">目录</el-tag> <el-tag v-else-if="scope.row.type === 1" size="small" type="success">菜单</el-tag> <el-tag v-else-if="scope.row.type === 2" size="small" type="info">按钮</el-tag> </template> </el-table-column> <el-table-column prop="path" label="菜单URL"> </el-table-column> <el-table-column prop="component" label="菜单组件"> </el-table-column> <el-table-column prop="orderNum" label="排序号"> </el-table-column> <el-table-column prop="statu" label="状态" width="120"> <template slot-scope="scope"> <el-tag v-if="scope.row.statu === 0" size="small" type="danger">禁用</el-tag> <el-tag v-else-if="scope.row.statu === 1" size="small" type="success">正常</el-tag> </template> </el-table-column> <el-table-column label="操作" width="120"> <template slot-scope="scope"> <el-button type="text" @click="editHandle(scope.row.id)" v-if="hasAuth('sys:menu:update')">编辑</el-button> <el-divider direction="vertical"></el-divider> <el-popconfirm title="确定要删除这条记录吗?" @confirm="delHandle(scope.row.id)" v-if="hasAuth('sys:menu:delete')"> <el-button type="text" slot="reference">删除</el-button> </el-popconfirm> </template> </el-table-column> </el-table> <el-dialog title="菜单信息" :visible.sync="dialogFormVisible" width="600px" @closed="resetForm('editForm')"> <el-form :model="editForm" :rules="editFormRules" ref="editForm"> <el-form-item label="上级菜单" prop="parentId" label-width="100px"> <!--模拟树形下拉框--> <el-select v-model="editForm.parentId" placeholder="请选择上级菜单" > <template v-for="item in tableData"> <el-option :label="item.name" :value="item.id"></el-option> <template v-for="child in item.children"> <el-option :label="child.name" :value="child.id"> <span>{{ '- ' + child.name }}</span> </el-option> </template> </template> </el-select> </el-form-item> <el-form-item label="菜单名称" prop="name" label-width="100px"> <el-input v-model="editForm.name" autocomplete="off"></el-input> </el-form-item> <el-form-item label="权限编码" prop="perms" label-width="100px"> <el-input v-model="editForm.perms" autocomplete="off"></el-input> </el-form-item> <el-form-item label="图标" prop="icon" label-width="100px"> <el-input v-model="editForm.icon" autocomplete="off"></el-input> </el-form-item> <el-form-item label="菜单URL" prop="path" label-width="100px"> <el-input v-model="editForm.path" autocomplete="off"></el-input> </el-form-item> <el-form-item label="菜单组件" prop="component" label-width="100px"> <el-input v-model="editForm.component" autocomplete="off"></el-input> </el-form-item> <el-form-item label="类型" prop="type" label-width="100px"> <el-radio-group v-model="editForm.type"> <el-radio :label=0>目录</el-radio> <el-radio :label=1>菜单</el-radio> <el-radio :label=2>按钮</el-radio> </el-radio-group> </el-form-item> <el-form-item label="状态" prop="statu" label-width="100px"> <el-radio-group v-model="editForm.statu"> <el-radio :label=0>禁用</el-radio> <el-radio :label=1>正常</el-radio> </el-radio-group> </el-form-item> <el-form-item label="排序号" prop="orderNum" label-width="100px"> <el-input-number v-model="editForm.orderNum" :min="1" label="排序号">1</el-input-number> </el-form-item> </el-form> <div slot="footer" class="dialog-footer"> <el-button @click="resetForm('editForm')">取 消</el-button> <el-button type="primary" @click="submitEditForm('editForm')">确 定</el-button> </div> </el-dialog> </div> </template> export default { name: "Menu", data() { return { searchForm: { name: '' }, tableData: [], multipleSelection: [], dialogFormVisible: false, editForm: { }, editFormRules: { parentId: [ {required: true, message: '请选择上级菜单', trigger: 'blur'} ], name: [ {required: true, message: '请输入名称', trigger: 'blur'} ], perms: [ {required: true, message: '请输入权限编码', trigger: 'blur'} ], type: [ {required: true, message: '请选择状态', trigger: 'blur'} ], orderNum: [ {required: true, message: '请填入排序号', trigger: 'blur'} ], statu: [ {required: true, message: '请选择状态', trigger: 'blur'} ] } } }, methods: { getMenuTree() { this.$axios.get("/sys/menu/list", { params: { name: this.searchForm.name } }).then(res => { console.log(res) this.tableData = res.data.data }) }, submitEditForm(formName) { this.$refs[formName].validate((valid) => { if (valid) { this.$axios.post('/sys/menu/' + (this.editForm.id? "update" : "save") ,this.editForm) .then(res => { console.log(res.data) this.resetForm(formName) this.$message({ showClose: true, message: '恭喜你,操作成功', type: 'success', onClose: () => { this.getMenuTree() } }); }) } else { console.log('error submit!!'); return false; } }); }, editHandle(id) { console.log(id) this.$axios.get("/sys/menu/info/" + id).then(res => { this.editForm = res.data.data this.dialogFormVisible = true }) }, delHandle(id) { this.$axios.post("/sys/menu/delete/" + id).then(res => { console.log(res) this.$message({ showClose: true, message: '恭喜你,操作成功', type: 'success', onClose: () => { this.getMenuTree() } }); }) }, resetForm(formName) { this.$refs[formName].resetFields(); this.editForm = {} this.dialogFormVisible = false } }, created() { this.getMenuTree() } } ``` ## 13. 角色界面 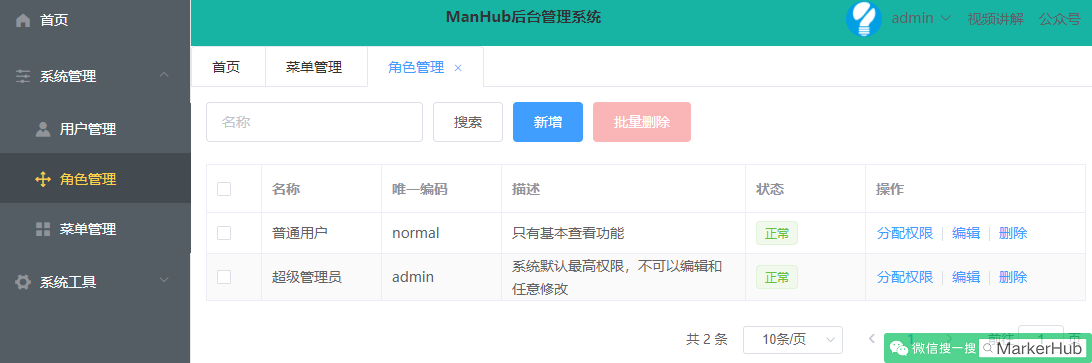 角色需要和菜单权限做关联,菜单是个树形结构的, 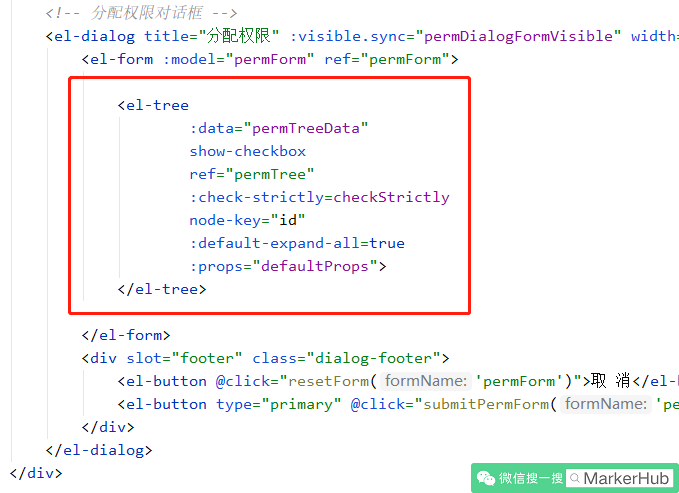 因为我们父节点是列表,所以注意不要选中父节点就自动选子节点,注意分开哈哈。 贴代码啦: * src/views/sys/Role.vue ```plain <template> <div> <!--搜索框--> <el-form :inline="true" :model="searchForm" class="searchForm"> <el-form-item> <el-input v-model="searchForm.name" placeholder="名称" clearable> </el-input> </el-form-item> <el-form-item> <el-button @click="getRoleList()">搜索</el-button> <el-button type="primary" @click="dialogFormVisible = true" v-if="hasAuth('sys:role:save')">新增</el-button> <el-popconfirm title="确定要删除这些记录吗?" @confirm="delHandle(null)" style="margin-left: 10px;" v-if="hasAuth('sys:role:delete')"> <el-button type="danger" slot="reference" :disabled="delBtnStu">批量删除</el-button> </el-popconfirm> </el-form-item> </el-form> <!--列表--> <el-table ref="multipleTable" border stripe :data="tableData" tooltip-effect="dark" style="width: 100%" @selection-change="handleSelectionChange"> <el-table-column type="selection" width="55"> </el-table-column> <el-table-column prop="name" label="名称" width="120"> </el-table-column> <el-table-column prop="code" label="唯一编码" width="120"> </el-table-column> <el-table-column prop="remark" label="描述"> </el-table-column> <el-table-column prop="statu" label="状态" width="120"> <template slot-scope="scope"> <el-tag v-if="scope.row.statu === 0" size="small" type="danger">禁用</el-tag> <el-tag v-else-if="scope.row.statu === 1" size="small" type="success">正常</el-tag> </template> </el-table-column> <el-table-column label="操作" width="220"> <template slot-scope="scope"> <el-button type="text" @click="permHandle(scope.row.id)" v-if="hasAuth('sys:role:perm')">分配权限</el-button> <el-divider direction="vertical"></el-divider> <el-button type="text" @click="editHandle(scope.row.id)" v-if="hasAuth('sys:role:update')">编辑</el-button> <el-divider direction="vertical"></el-divider> <el-popconfirm title="确定要删除这条记录吗?" @confirm="delHandle(scope.row.id)" v-if="hasAuth('sys:role:delete')"> <el-button type="text" slot="reference">删除</el-button> </el-popconfirm> </template> </el-table-column> </el-table> <!--页码--> <el-pagination @size-change="handleSizeChange" @current-change="handleCurrentChange" :current-page="current" :page-sizes="[10, 20, 50, 100]" :page-size="size" layout="total, sizes, prev, pager, next, jumper" :total="total"> </el-pagination> <!-- 编辑对话框 --> <el-dialog title="角色信息" :visible.sync="dialogFormVisible" width="600px" @closed="resetForm('editForm')"> <el-form :model="editForm" :rules="editFormRules" ref="editForm"> <el-form-item label="角色名称" prop="name" label-width="100px"> <el-input v-model="editForm.name" autocomplete="off"></el-input> </el-form-item> <el-form-item label="唯一编码" prop="code" label-width="100px"> <el-input v-model="editForm.code" autocomplete="off"></el-input> </el-form-item> <el-form-item label="描述" prop="remark" label-width="100px"> <el-input v-model="editForm.remark" autocomplete="off"></el-input> </el-form-item> <el-form-item label="状态" prop="statu" label-width="100px"> <el-radio-group v-model="editForm.statu"> <el-radio :label="0">禁用</el-radio> <el-radio :label="1">正常</el-radio> </el-radio-group> </el-form-item> </el-form> <div slot="footer" class="dialog-footer"> <el-button @click="resetForm('editForm')">取 消</el-button> <el-button type="primary" @click="submitEditForm('editForm')">确 定</el-button> </div> </el-dialog> <!-- 分配权限对话框 --> <el-dialog title="分配权限" :visible.sync="permDialogFormVisible" width="600px" @closed="resetForm('permForm')"> <el-form :model="permForm" ref="permForm"> <el-tree :data="permTreeData" show-checkbox ref="permTree" :check-strictly=checkStrictly node-key="id" :default-expand-all=true :props="defaultProps"> </el-tree> </el-form> <div slot="footer" class="dialog-footer"> <el-button @click="resetForm('permForm')">取 消</el-button> <el-button type="primary" @click="submitPermForm('permForm')">确 定</el-button> </div> </el-dialog> </div> </template> export default { name: "Role", data() { return { searchForm: { name: '' }, tableData: [], multipleSelection: [], dialogFormVisible: false, permDialogFormVisible: false, delBtnStu: true, current: 1, total: 0, size: 10, editForm: { }, editFormRules: { name: [ {required: true, message: '请输入名称', trigger: 'blur'} ], code: [ {required: true, message: '请输入唯一编码', trigger: 'blur'} ], statu: [ {required: true, message: '请选择状态', trigger: 'blur'} ] }, permForm: { }, defaultProps: { children: 'children', label: 'name' }, permTreeData: [], treeCheckedKeys: [], checkStrictly: true } }, methods: { toggleSelection(rows) { if (rows) { rows.forEach(row => { this.$refs.multipleTable.toggleRowSelection(row); }); } else { this.$refs.multipleTable.clearSelection(); } }, handleSelectionChange(val) { this.multipleSelection = val; this.delBtnStu = val.length == 0 }, getRoleList() { this.$axios.get('/sys/role/list', { params: { name: this.searchForm.name, current: this.current, size: this.size } }).then(res => { this.tableData = res.data.data.records this.current = res.data.data.current this.size = res.data.data.size this.total = res.data.data.total console.log(res) }) this.$axios.get("/sys/menu/list").then(res => { this.permTreeData = res.data.data }) }, handleSizeChange(val) { this.size = val this.getRoleList() }, handleCurrentChange(val) { this.current = val this.getRoleList() }, submitEditForm(formName) { this.$refs[formName].validate((valid) => { if (valid) { this.$axios.post('/sys/role/' + (this.editForm.id? "update" : "save") ,this.editForm) .then(res => { console.log(res.data) this.resetForm(formName) this.$message({ showClose: true, message: '恭喜你,操作成功', type: 'success', onClose: () => { this.getRoleList() } }); }) } else { console.log('error submit!!'); return false; } }); }, editHandle(id) { console.log(id) this.$axios.get("/sys/role/info/" + id).then(res => { this.editForm = res.data.data this.dialogFormVisible = true }) }, delHandle(id) { console.log(id) var ids = [] console.log(id ? 31:32) id ? ids.push(id) : this.multipleSelection.forEach(row => { ids.push(row.id) }) console.log(ids) this.$axios.post("/sys/role/delete", ids).then(res => { console.log(res) this.$message({ showClose: true, message: '恭喜你,操作成功', type: 'success', onClose: () => { this.getRoleList() } }); }) }, resetForm(formName) { this.$refs[formName].resetFields(); this.editForm = {} this.dialogFormVisible = false this.permDialogFormVisible = false }, permHandle(id) { this.permDialogFormVisible = true this.$axios.get("/sys/role/info/" + id).then(res => { this.$refs.permTree.setCheckedKeys(res.data.data.menuIds); this.permForm = res.data.data console.log("this.treeCheckedKeys") console.log(this.treeCheckedKeys) }) }, submitPermForm(formName) { var menuIds = [] menuIds = this.$refs.permTree.getCheckedKeys() // menuIds = menuIds.concat(this.$refs.permTree.getHalfCheckedKeys()) // 半选中状态的父节点 console.log(menuIds) console.log(this.permForm.id) this.$axios.post("/sys/role/perm/" + this.permForm.id, menuIds).then(res => { this.$message({ showClose: true, message: '恭喜你,操作成功', type: 'success', onClose: () => { this.resetForm(formName) } }); this.permDialogFormVisible = false }) }, }, created() { this.getRoleList() } } ``` ## 14. 用户界面 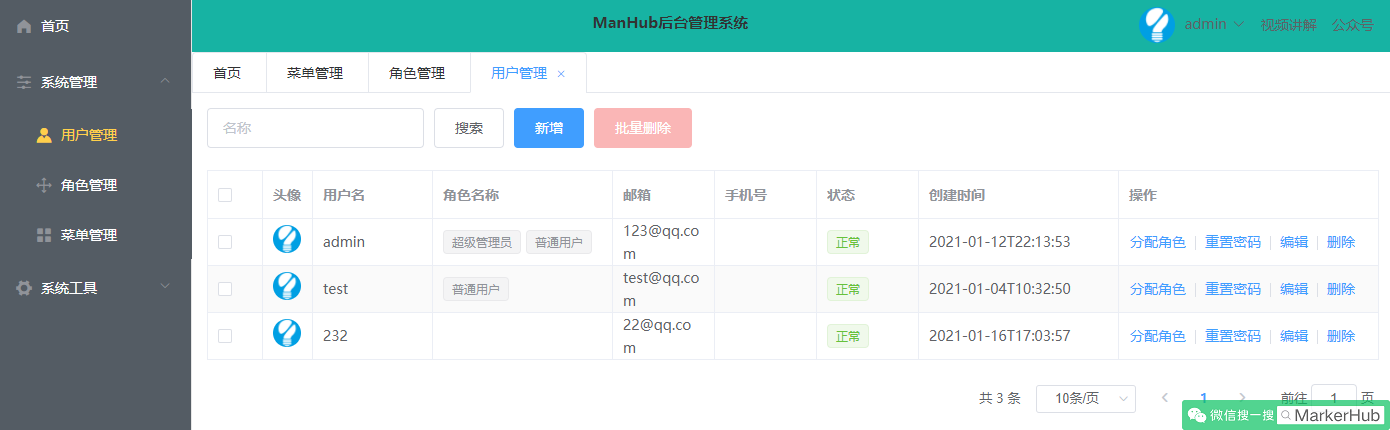 线上演示:[https://www.markerhub.com/vueadmin/](https://www.markerhub.com/vueadmin/) 用户管理有个操作叫分配角色,和角色添加权限差不多的操作 贴代码啦: ```plain <template> <div> <!--搜索框--> <el-form :inline="true" :model="searchForm"> <el-form-item> <el-input v-model="searchForm.username" placeholder="名称" clearable> </el-input> </el-form-item> <el-form-item> <el-button>搜索</el-button> <el-button type="primary" @click="dialogFormVisible = true" v-if="hasAuth('sys:user:save')">新增</el-button> <el-popconfirm title="确定要删除这些记录吗?" @confirm="delHandle(null)" style="margin-left: 10px;" v-if="hasAuth('sys:user:delete')"> <el-button type="danger" slot="reference" :disabled="delBtnStu">批量删除</el-button> </el-popconfirm> </el-form-item> </el-form> <!--列表--> <el-table ref="multipleTable" border stripe :data="tableData" tooltip-effect="dark" style="width: 100%" @selection-change="handleSelectionChange"> <el-table-column type="selection" width="55"> </el-table-column> <el-table-column label="头像" width="50"> <template slot-scope="scope"> <el-avatar size="small" :src="scope.row.avatar"></el-avatar> </template> </el-table-column> <el-table-column prop="username" label="用户名" width="120"> </el-table-column> <el-table-column label="角色名称" width="180"> <template slot-scope="scope"> <el-tag style="margin-right: 5px;" size="small" type="info" v-for="item in scope.row.roles">{{item.name}}</el-tag> </template> </el-table-column> <el-table-column prop="email" label="邮箱"> </el-table-column> <el-table-column prop="phone" label="手机号"> </el-table-column> <el-table-column label="状态"> <template slot-scope="scope"> <el-tag v-if="scope.row.statu === 0" size="small" type="danger">禁用</el-tag> <el-tag v-else-if="scope.row.statu === 1" size="small" type="success">正常</el-tag> </template> </el-table-column> <el-table-column prop="created" label="创建时间" width="200"> </el-table-column> <el-table-column width="260px" label="操作"> <template slot-scope="scope"> <el-button type="text" @click="roleHandle(scope.row.id)" v-if="hasAuth('sys:user:role')">分配角色</el-button> <el-divider direction="vertical"></el-divider> <el-button type="text" @click="repassHandle(scope.row.id, scope.row.username)" v-if="hasAuth('sys:user:repass')">重置密码</el-button> <el-divider direction="vertical"></el-divider> <el-button type="text" @click="editHandle(scope.row.id)" v-if="hasAuth('sys:user:update')">编辑</el-button> <el-divider direction="vertical"></el-divider> <el-popconfirm title="确定要删除这条记录吗?" @confirm="delHandle(scope.row.id)" v-if="hasAuth('sys:user:delete')"> <el-button type="text" slot="reference">删除</el-button> </el-popconfirm> </template> </el-table-column> </el-table> <!--页码--> <el-pagination @size-change="handleSizeChange" @current-change="handleCurrentChange" :current-page="current" :page-sizes="[10, 20, 50, 100]" :page-size="size" layout="total, sizes, prev, pager, next, jumper" :total="total"> </el-pagination> <el-dialog title="用户信息" :visible.sync="dialogFormVisible" width="600px"> <el-form :model="editForm" :rules="editFormRules" ref="editForm"> <el-form-item label="用户名" prop="username" label-width="100px"> <el-input v-model="editForm.username" autocomplete="off"></el-input> <el-alert title="初始密码为888888" :closable="false" type="info" style="line-height: 12px;" ></el-alert> </el-form-item> <el-form-item label="邮箱" prop="email" label-width="100px"> <el-input v-model="editForm.email" autocomplete="off"></el-input> </el-form-item> <el-form-item label="手机号" prop="phone" label-width="100px"> <el-input v-model="editForm.phone" autocomplete="off"></el-input> </el-form-item> <el-form-item label="状态" prop="statu" label-width="100px"> <el-radio-group v-model="editForm.statu"> <el-radio :label="0">禁用</el-radio> <el-radio :label="1">正常</el-radio> </el-radio-group> </el-form-item> </el-form> <div slot="footer" class="dialog-footer"> <el-button @click="resetForm('editForm')">取 消</el-button> <el-button type="primary" @click="submitEditForm('editForm')">确 定</el-button> </div> </el-dialog> <!-- 分配权限对话框 --> <el-dialog title="分配角色" :visible.sync="roleDialogFormVisible" width="600px" @closed="resetForm('roleForm')"> <el-form :model="roleForm" ref="roleForm"> <el-tree :data="roleTreeData" show-checkbox ref="roleTree" node-key="id" :default-expand-all=true :props="defaultProps"> </el-tree> </el-form> <div slot="footer" class="dialog-footer"> <el-button @click="resetForm('roleForm')">取 消</el-button> <el-button type="primary" @click="submitRoleForm('roleForm')">确 定</el-button> </div> </el-dialog> </div> </template> export default { name: "User", data() { return { searchForm: { username: '' }, editForm: { }, editFormRules: { username: [ {required: true, message: '请输入用户名称', trigger: 'blur'} ], email: [ {required: true, message: '请输入邮箱', trigger: 'blur'} ], statu: [ {required: true, message: '请选择状态', trigger: 'blur'} ] }, current: 1, total: 0, size: 10, dialogFormVisible: false, tableData: [], multipleSelection: [], delBtnStu: true, roleDialogFormVisible: false, roleForm: { }, defaultProps: { children: 'children', label: 'name' }, roleTreeData: [], treeCheckedKeys: [], } }, methods: { toggleSelection(rows) { if (rows) { rows.forEach(row => { this.$refs.multipleTable.toggleRowSelection(row); }); } else { this.$refs.multipleTable.clearSelection(); } }, handleSelectionChange(rows) { this.multipleSelection = rows; this.delBtnStu = rows.length == 0 }, getUserList() { this.$axios.get('/sys/user/list', { params: { name: this.searchForm.name, current: this.current, size: this.size } }).then(res => { this.tableData = res.data.data.records this.current = res.data.data.current this.size = res.data.data.size this.total = res.data.data.total }) }, handleSizeChange(val) { this.size = val this.getUserList() }, handleCurrentChange(val) { this.current = val this.getUserList() }, submitEditForm(formName) { this.$refs[formName].validate((valid) => { if (valid) { this.$axios.post('/sys/user/' + (this.editForm.id? "update" : "save") ,this.editForm) .then(res => { console.log(res.data) this.resetForm(formName) this.$message({ showClose: true, message: '恭喜你,操作成功', type: 'success', onClose: () => { this.getUserList() } }); }) } else { console.log('error submit!!'); return false; } }); }, editHandle(id) { console.log(id) this.$axios.get("/sys/user/info/" + id).then(res => { this.editForm = res.data.data this.dialogFormVisible = true }) }, delHandle(id) { var ids = [] id ? ids.push(id) : this.multipleSelection.forEach(row => { ids.push(row.id) }) console.log(ids) this.$axios.post("/sys/user/delete", ids).then(res => { this.$message({ showClose: true, message: '恭喜你,操作成功', type: 'success', onClose: () => { this.getUserList() } }); }) }, resetForm(formName) { this.$refs[formName].resetFields(); this.editForm = {} this.dialogFormVisible = false this.roleDialogFormVisible = false }, roleHandle(id) { this.$axios.get("/sys/user/info/" + id).then(res => { const sysuser = res.data.data var roleIds = [] sysuser.roles.forEach(row => { roleIds.push(row.id) }) console.log("roleIds") console.log(roleIds) this.roleForm = res.data.data console.log("this.treeCheckedKeys") console.log(this.treeCheckedKeys) this.$axios.get("/sys/role/list").then(res => { this.roleTreeData = res.data.data.records this.$refs.roleTree.setCheckedKeys(roleIds); }) }) this.roleDialogFormVisible = true }, submitRoleForm(formName) { var roleIds = [] roleIds = this.$refs.roleTree.getCheckedKeys() console.log(roleIds) console.log(this.roleForm.id) this.$axios.post("/sys/user/role/" + this.roleForm.id, roleIds).then(res => { this.$message({ showClose: true, message: '恭喜你,操作成功', type: 'success', onClose: () => { this.resetForm(formName) this.getUserList() } }); this.roleDialogFormVisible = false }) }, repassHandle(id, username) { this.$confirm('将重置用户【' + username + '】的密码, 是否继续?', '提示', { confirmButtonText: '确定', cancelButtonText: '取消', type: 'warning' }).then(() => { this.$axios.post("/sys/user/repass", id).then(res => { this.$message({ showClose: true, message: '恭喜你,操作成功', type: 'success', onClose: () => { } }); }) }) } }, created() { this.getUserList() } } ``` ## 15. 按钮权限的控制 上面的菜单、角色、用户有增删改查操作,但是不是每个用户都有权限的,没权限的用户我们应该隐藏按钮,因此我们需要通过条件来判断按钮是否应该显示,那么应该怎么定义一个方法可以让全局都能使用呢? 我们再src下面新建一个js文件用于定义一个全局使用的方法: * src/globalFun.js ```plain import Vue from 'vue' Vue.mixin({ methods: { hasAuth(perm) { var authority = this.$store.state.menus.permList console.log(authority) return authority.indexOf(perm) > -1 } } }) ``` 之前我们在加载菜单的时候说过,我们同时要加载权限数据,现在就需要用到权限数据了,这里数组,因此我们通过按钮的权限是否在所有权限列表内就行了。 mixin的作用是多个组件可以共享数据和方法,在使用mixin的组件中引入后,mixin中的方法和属性也就并入到该组件中,可以直接使用,在已有的组件数据和方法进行了扩充。引入mixin分全局引用和局部引用。 然后我们需要在main.js中引入这个文件 * src\main.js ```plain import gobal from "./globalFun" ``` 这样全局就可以使用啦,比如我们在新增按钮这里做判断: * src/views/sys/Menu.vue ```plain <el-button type="primary" @click="dialogFormVisible = true" v-if="hasAuth('sys:menu:save')">新增</el-button> ``` 通过v-if来判断返回是否为true从而判断是否显示。 ## 16. 结束语 视频讲解:https://www.bilibili.com/video/BV1af4y1s7Wh/ 线上演示:https://www.markerhub.com/vueadmin/ 首发公众号:MarkerHub 撰写人:吕一明 转载请保留此声明,感谢!
阅读全部
全部评论:
0
条
我有话说:
@
发送
-- 目录 --
关注官方公众号:
Java问答社
接收最新有赏问答推送!
最新发布
1.
SpringBoot 接口数据加解密技巧,so easy!
2.
一个依赖搞定 Spring Boot 反爬虫,防止接口盗刷!
3.
Java8 Stream 极大简化了代码,它是如何实现的?
4.
马上大四了,秋招还是春招好?先找工作还是找实习?
5.
万字详解 Linux 常用指令(值得收藏)
6.
4年工作经验,多线程间的5种通信方式都说不出来,你敢信?
最新评论
部署文档没有了,您能提供下吗
部署文档没有了,能提供下吗
我测你的🐎
源码从哪里获取请问
想学
那篇石墨文档 没有权限查看哇